Honeywell T4 Installation Manual PDF: A Comprehensive Guide
This detailed PDF provides a step-by-step guide for installing and operating your Honeywell T4 thermostat‚ ensuring effortless setup and optimal performance.
Begin your journey with clear instructions‚ covering everything from initial setup to advanced programming‚ for a seamless experience.
Understanding the Honeywell T4 Thermostat
The Honeywell T4 Pro Smart Thermostat represents a significant advancement in home climate control‚ offering a blend of intuitive operation and powerful features. This thermostat isn’t just about setting temperatures; it’s about creating a comfortable and energy-efficient living environment tailored to your lifestyle.
Designed with a user-friendly interface‚ the T4 allows for easy programming of heating and cooling schedules‚ optimizing energy usage and reducing utility bills. Its smart capabilities extend to remote control via a mobile app‚ providing convenience and accessibility from anywhere.
Understanding the T4’s core functionalities – including geofencing‚ smart alerts‚ and learning capabilities – is crucial for maximizing its benefits. This guide will delve into these aspects‚ ensuring you can harness the full potential of your new thermostat. The T4 is compatible with a wide range of HVAC systems‚ making it a versatile choice for many homes.
What’s Included in the Box
Upon opening your Honeywell T4 Pro Smart Thermostat package‚ you’ll find several key components essential for a successful installation. The box contains the T4 thermostat itself‚ featuring a sleek and modern design intended to complement any home décor.
Alongside the thermostat‚ you’ll receive a T4 base plate‚ which serves as the mounting point for the device and facilitates the wiring connections. A screw pack is included‚ providing the necessary hardware for securely attaching the base plate to the wall.
Furthermore‚ the package includes wire labels to help you identify and organize the existing wiring from your old thermostat. A quick installation guide offers a condensed overview of the setup process‚ while a detailed installation manual (available in PDF format) provides comprehensive instructions and troubleshooting tips. Finally‚ you’ll find mounting screws and anchors for various wall types.
Safety Precautions Before Installation
Prioritizing safety is crucial before commencing the Honeywell T4 thermostat installation. Always disconnect power to your HVAC system at the breaker box to avoid electrical shock. Confirm the power is off using a non-contact voltage tester before handling any wires.
Exercise caution when working with wiring; if you are uncomfortable or unfamiliar with electrical work‚ consult a qualified HVAC technician. Never attempt installation during wet or damp conditions. Ensure your workspace is well-lit and free of obstructions.
Properly label all wires before disconnecting them from your old thermostat to prevent miswiring during the installation process. Read the entire installation manual (available as a PDF) before beginning to understand all safety warnings and instructions. Keep small parts away from children and pets. Failure to follow these precautions could result in injury or damage to your HVAC system.

Installation Process: Step-by-Step
Follow this manual’s clear‚ concise steps for a smooth Honeywell T4 installation. From power disconnection to wiring and configuration‚ we guide you effectively.
Turning Off Power to Your HVAC System
Before commencing any installation work with your Honeywell T4 thermostat‚ absolutely ensure the power to your heating‚ ventilation‚ and air conditioning (HVAC) system is completely switched off. This is a critical safety precaution to prevent electrical shock and potential damage to the thermostat or your HVAC equipment.
Locate your circuit breaker panel‚ typically found in a basement‚ garage‚ or utility room. Identify the breaker that controls your HVAC system – it’s often labeled “Furnace” or “HVAC‚” but may require some investigation. Firmly switch the breaker to the “OFF” position.
To verify the power is indeed off‚ use a non-contact voltage tester at the thermostat wires. If the tester doesn’t indicate voltage‚ you’re safe to proceed. Double-checking is essential. Ignoring this step could lead to serious injury or equipment malfunction. Always prioritize safety during installation.
Removing Your Old Thermostat
Carefully remove your existing thermostat from the wall. Most thermostats have a cover plate that can be gently pried off‚ revealing the wiring connections. Before disconnecting any wires‚ it’s crucial to clearly label each wire with the corresponding terminal letter on your old thermostat’s baseplate. Use the provided wire labels or masking tape and a pen.
Take a photograph of the wiring as a backup reference – this is incredibly helpful during the Honeywell T4 installation process. Once labeled‚ carefully disconnect each wire from the old thermostat’s terminals.
Remove the old baseplate from the wall. You may need to unscrew it. Be mindful of any wall anchors and ensure the mounting surface is clean and level for the new Honeywell T4 baseplate. Handle the wires with care to avoid damage or shorts.
Identifying Wires and Terminal Labels
Accurate wire identification is paramount for a successful Honeywell T4 installation. Common terminal labels include R (power)‚ C (common)‚ W (heat)‚ Y (cooling)‚ G (fan)‚ and potentially others like O/B (reversing valve for heat pumps). Refer to your old thermostat’s wiring and the labels you created – or the photograph you took – to match these to the Honeywell T4’s terminal designations.
Wire colors aren’t always standardized‚ so relying solely on color can be misleading. Always prioritize the terminal labels from your old thermostat. The ‘C-wire’ (common wire) is often blue‚ but not always. Its presence is crucial for consistent power to the T4.
If you’re unsure about any wire‚ consult a qualified HVAC technician. Incorrect wiring can damage your system. Double-check your work before proceeding to the wiring stage.
Wiring the Honeywell T4 Thermostat
Connect wires to the T4 base plate‚ matching labels carefully. Diagrams illustrate wiring for gas‚ electric‚ and heat pump systems‚ ensuring correct functionality and safety.
Wiring Diagrams for Common HVAC Systems (Gas‚ Electric‚ Heat Pump)
Understanding your HVAC system is crucial for correct wiring. This section provides detailed wiring diagrams tailored to the three most common types: gas‚ electric‚ and heat pump systems. Each diagram clearly illustrates the corresponding terminal connections on the Honeywell T4 base plate.
For gas systems‚ you’ll typically connect wires for heating (W)‚ common (C)‚ and potentially a fan (G) and power-stealing applications. Electric systems generally involve wiring for heating (R‚ W)‚ cooling (Y)‚ and a common wire (C). Heat pump systems are more complex‚ requiring connections for heating (O/B‚ W2)‚ cooling (Y)‚ reversing valve (R)‚ auxiliary heat (AUX)‚ fan (G)‚ and common (C).
Carefully compare your existing wiring to these diagrams before making any connections. Incorrect wiring can damage your HVAC system or the thermostat. If you are unsure about any aspect of the wiring process‚ consult a qualified HVAC technician.
Always double-check all connections before restoring power.
Understanding C-Wire Requirements & Solutions
The Honeywell T4 thermostat often requires a “C-wire” (common wire) for consistent power. Many older HVAC systems lack this wire‚ which can prevent the thermostat from functioning correctly. This section details the importance of the C-wire and provides several solutions if one isn’t present.
A C-wire provides continuous 24VAC power‚ enabling features like Wi-Fi connectivity and consistent display operation. Without it‚ the thermostat may “power steal” from other wires‚ leading to unreliable performance. Solutions include: running a new C-wire from your furnace‚ using a C-wire adapter (often included or sold separately)‚ or utilizing an existing unused wire as a C-wire.

Carefully assess your system and wiring before attempting any modifications. Improperly installing a C-wire or adapter can damage your HVAC equipment. If you’re uncomfortable with electrical work‚ consult a qualified HVAC professional for assistance.
Refer to the included adapter instructions for specific guidance.
Connecting the Wires to the T4 Base Plate
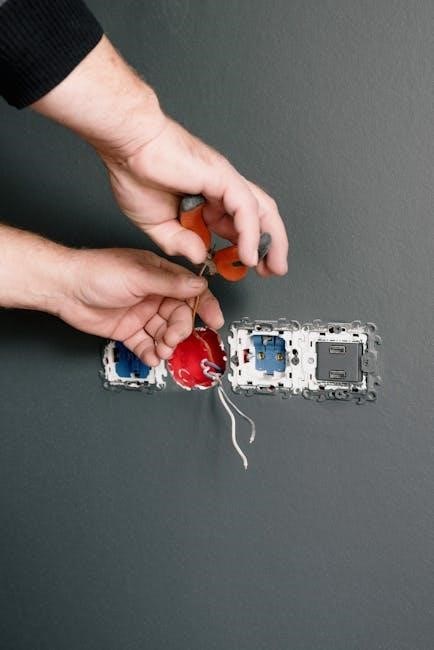
Once wires are identified‚ carefully connect them to the corresponding terminals on the T4 base plate. Ensure each wire is securely inserted into the correct terminal – a loose connection can cause malfunctions. Double-check your wiring against the diagram specific to your HVAC system (gas‚ electric‚ or heat pump) before proceeding.
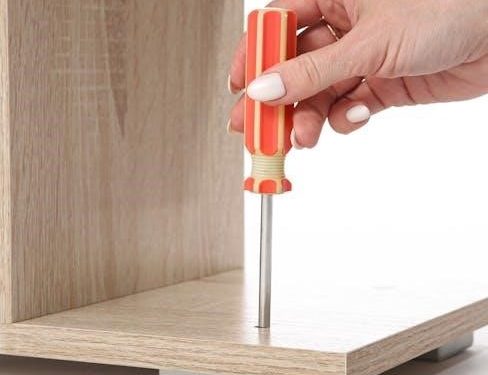
Use a small‚ flat-head screwdriver to tighten the terminal screws‚ but avoid over-tightening‚ which could damage the terminals. Gently tug on each wire to confirm it’s firmly held in place. Pay close attention to the C-wire (if applicable) and ensure it’s connected to the designated ‘C’ terminal.
Take a photograph of the wiring before attaching the thermostat faceplate – this serves as a valuable reference if any issues arise later. Proper wiring is crucial for the T4’s functionality and the safe operation of your HVAC system.
Proceed cautiously and consult the manual if unsure.

Configuring the Honeywell T4 Thermostat
After installation‚ personalize your T4! This section guides you through initial setup‚ display settings‚ date/time configuration‚ and programming heating/cooling schedules.
Initial Power-Up and Display Settings
Upon restoring power to your HVAC system‚ the Honeywell T4 thermostat will initiate its startup sequence. The display will illuminate‚ potentially cycling through a self-test and displaying the Honeywell logo. Allow the thermostat a few moments to complete this process.
The initial display will likely prompt you to select your preferred language and units (Fahrenheit or Celsius). Use the navigation buttons on the thermostat face to make your selections. Confirm each choice by pressing the ‘OK’ or equivalent button.
Next‚ the display brightness may be adjustable. Experiment with different levels to find a comfortable setting that ensures readability in various lighting conditions. Consider the ambient light in the room when making this adjustment. The thermostat may also offer options for display themes or color schemes‚ allowing for further personalization. Familiarize yourself with the menu structure to access these settings later if desired.
Pay attention to any initial prompts regarding Wi-Fi connectivity. You can choose to connect now or postpone this step for later configuration.
Setting Date and Time
Accurate date and time settings are crucial for proper scheduling and operation of your Honeywell T4 thermostat. To access these settings‚ navigate to the main menu using the thermostat’s control buttons. Look for options labeled “Date/Time‚” “Settings‚” or similar.
Within the Date/Time menu‚ you’ll typically be able to adjust the year‚ month‚ day‚ hour‚ and minute. Use the up and down arrows‚ or similar controls‚ to increment or decrement each value. Confirm each selection by pressing the ‘OK’ or ‘Select’ button.
Ensure you set the correct time zone for your location. The thermostat may offer a list of cities or time zones to choose from. Selecting the correct time zone ensures that your heating and cooling schedules align with the actual time of day.
Some models may offer automatic time updates via Wi-Fi connectivity. If available‚ enabling this feature will ensure your thermostat always displays the correct time. Double-check the settings after initial configuration to confirm accuracy.
Programming Your Heating and Cooling Schedules
The Honeywell T4 allows for customized heating and cooling schedules to maximize comfort and energy savings. Access the scheduling menu through the main thermostat interface‚ typically labeled “Schedule‚” “Programming‚” or a similar option;
You can create different schedules for weekdays and weekends‚ or even individual days. Define time periods – such as “Wake‚” “Leave‚” “Return‚” and “Sleep” – and assign desired temperatures for each period.
Utilize the thermostat’s intuitive interface to set temperatures for heating and cooling during each time period. Consider your daily routines when creating your schedule; lower temperatures when you’re away or asleep.
Many T4 models support multiple schedules‚ allowing you to tailor settings to different family members or specific needs. Review and adjust your schedule periodically to optimize comfort and efficiency throughout the year. Save your changes to activate the new schedule.

Troubleshooting Common Issues
This section offers solutions for typical problems like power failures‚ inaccurate readings‚ and Wi-Fi connectivity issues with your Honeywell T4 thermostat.
Thermostat Not Powering On
If your Honeywell T4 thermostat fails to power on‚ begin by verifying the power supply to your HVAC system is active. Check the circuit breaker dedicated to your heating and cooling equipment; a tripped breaker is a common cause.
Next‚ inspect the thermostat wiring. Ensure all wires are securely connected to the correct terminals on the base plate. A loose connection can interrupt the power flow. Specifically‚ confirm the ‘C-wire’ (common wire) is properly connected‚ as this is essential for consistent power.
If a C-wire isn’t present‚ consider installing one or utilizing a C-wire adapter (sold separately). Double-check the batteries if your model uses them‚ replacing them with fresh ones. Finally‚ review the installation manual to confirm correct wiring based on your specific HVAC system type – gas‚ electric‚ or heat pump.
If issues persist‚ consult a qualified HVAC technician.
Incorrect Temperature Readings
If your Honeywell T4 displays inaccurate temperature readings‚ several factors could be at play. First‚ ensure the thermostat isn’t directly exposed to sunlight‚ drafts‚ or heat-generating appliances. These external influences can skew the temperature sensor’s accuracy.
Check for proper airflow around the thermostat. Obstructions like furniture or curtains can disrupt accurate readings. Calibrate the temperature within the thermostat’s settings menu; the manual details this process. This allows you to offset the displayed temperature to match a trusted thermometer.
Verify the thermostat’s location isn’t near exterior walls or poorly insulated areas. Consider a system reset to default settings‚ then reconfigure. If the problem continues‚ inspect the wiring connections for looseness. A faulty temperature sensor may require professional HVAC assistance.
Refer to the installation manual for detailed troubleshooting steps.
Connectivity Problems (Wi-Fi)

Experiencing Wi-Fi connection issues with your Honeywell T4? Begin by verifying your home network is functioning correctly and that the password entered into the thermostat is accurate. Ensure the thermostat is within range of your Wi-Fi router; signal strength diminishes with distance and obstructions.
Restart both your router and the Honeywell T4. This often resolves temporary connectivity glitches. Check for firmware updates within the Honeywell Home app‚ as these frequently include Wi-Fi stability improvements. Confirm your router’s security settings aren’t blocking the thermostat’s access – some older security protocols can cause conflicts.
If problems persist‚ consult the installation manual’s troubleshooting section for specific error codes. Consider temporarily disabling the router’s firewall to test if it’s the source of the issue. For continued difficulties‚ contact Honeywell Home support for assistance.
The PDF manual provides detailed network configuration guidance.