Welcome to the Singer Curvy Sewing Machine Manual, your comprehensive guide to understanding and operating the Singer Curvy 8763 sewing machine․ This manual provides detailed instructions for setup, threading, stitch selection, and maintenance, ensuring seamless sewing experiences for both beginners and experienced users․
1;1 Overview of the Singer Curvy Sewing Machine
The Singer Curvy Sewing Machine, model 8763, is a versatile and user-friendly sewing machine designed for a wide range of sewing projects․ It features an automatic needle threader, SwiftSmart Threading System, and a variety of built-in stitches, making it ideal for both beginners and experienced sewists․ The machine is equipped with adjustable stitch length and width, allowing for customization on different fabrics․ Its compact design and intuitive controls ensure ease of use, while the included accessories, such as presser feet, enhance sewing versatility and efficiency․
1․2 Importance of Reading the Manual
Reading the Singer Curvy Sewing Machine Manual is essential for understanding its features, proper operation, and maintenance․ The manual provides detailed guidance on setup, threading, and troubleshooting, ensuring safe and effective use․ It helps users avoid errors, optimize performance, and extend the machine’s lifespan․ By following the manual, you can unlock the machine’s full potential, whether you’re a beginner or an experienced sewist․ It serves as a comprehensive resource for achieving professional results in all your sewing projects․
1․3 Key Features of the Singer Curvy Sewing Machine
The Singer Curvy Sewing Machine is designed with innovative features to enhance your sewing experience․ It includes the SwiftSmart Threading System for effortless threading, a built-in needle threader, and a variety of stitch options․ The machine also features automatic tension, ensuring consistent stitching․ With its heavy-duty frame and intuitive controls, it offers durability and ease of use․ These features make the Singer Curvy ideal for both beginners and experienced sewists, providing versatility for a wide range of sewing projects․

Machine Identification and Parts
This section helps identify and understand the Singer Curvy’s components, including the power button, spool pins, and presser feet, using the provided diagram for easy reference․
2․1 Understanding the Machine Components
Understanding the Singer Curvy sewing machine components is essential for effective operation․ Key parts include the power button, spool pins, presser feet, and bobbin case․ The SwiftSmart Threading System simplifies threading, while the built-in needle threader aids in quick setup․ Refer to the diagram in the manual, which labels components like the stitch selector, tension dials, and reverse stitch button․ Familiarizing yourself with these parts ensures proper usage and maintenance, helping you navigate the machine confidently for various sewing tasks․
2․2 Serial Number and Model Identification
The Singer Curvy sewing machine’s serial number is located on the base or back of the machine․ This number is crucial for ordering parts and ensuring compatibility․ The first digit of the serial number must match when purchasing accessories․ The model identification, such as Curvy 8763 or 8780, indicates specific features and capabilities․ Refer to the manual or manufacturer’s website for accurate identification and support․ This information ensures proper maintenance and accessory selection for your Singer Curvy sewing machine․
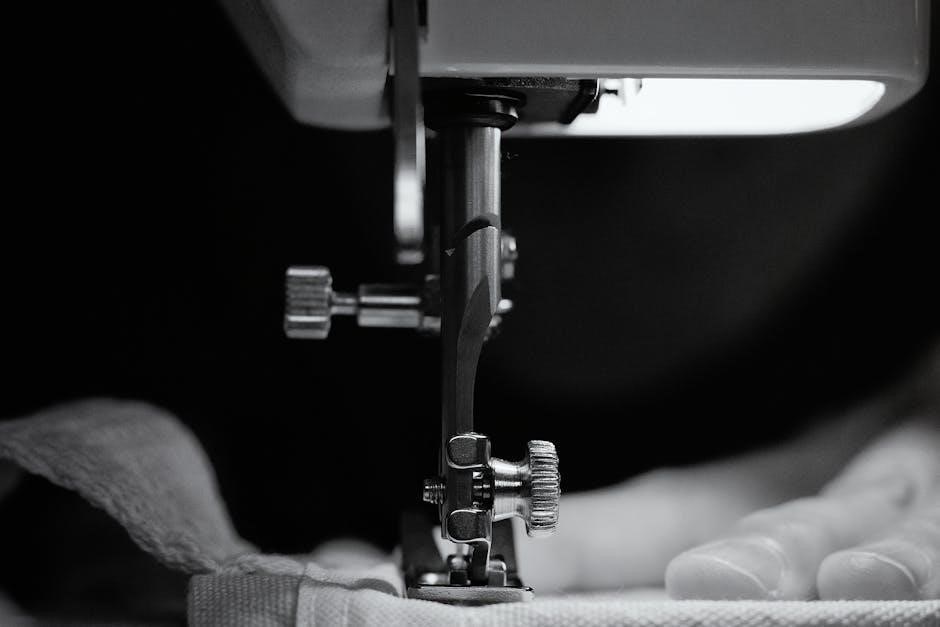
2․3 Diagram of the Singer Curvy Sewing Machine
The diagram provided in the manual illustrates the Singer Curvy sewing machine’s components, labeling key parts such as the spool pins, presser feet, and stitch selectors․ This visual guide helps users identify and understand the machine’s layout, ensuring proper operation and maintenance․ The diagram is a valuable reference for locating specific features and troubleshooting common issues․ It complements the written instructions, offering a clear and concise overview of the machine’s design and functionality․

Safety Precautions
Always follow safety guidelines to ensure safe operation of the Singer Curvy sewing machine․ Keep children away, avoid loose clothing, and use genuine Singer parts to prevent accidents․
3․1 General Safety Guidelines
Always prioritize safety when using the Singer Curvy sewing machine․ Keep children and pets away while operating․ Avoid wearing loose clothing or jewelry that could get caught․ Ensure the machine is placed on a stable, flat surface․ Use only genuine Singer parts and accessories to maintain safety standards․ Never touch electrical components with wet hands․ Keep the sewing area well-lit and clear of clutter․ Follow the manual’s instructions for threading and operation to prevent accidents․ Regularly inspect the machine for damage or wear․ Store the machine in a dry, cool place when not in use․
3․2 Electrical Safety Tips
Ensure electrical safety by using the Singer Curvy sewing machine with a properly grounded power source․ Avoid operating the machine near water or in humid environments․ Never touch electrical components with wet hands․ Check the power cord for damage before use and replace it if necessary․ Keep the machine unplugged when not in use or during maintenance․ Use only genuine Singer-approved adapters and avoid overloading circuits․ Store the machine in a dry, cool place to prevent electrical hazards․ Always follow the manual’s guidelines for safe operation․
3․3 Handling Sharp Objects and Parts
Handle sharp objects like needles, presser feet, and rotary hooks with care to avoid injury․ Use the built-in needle threader to avoid direct contact with the needle․ Store sharp parts in protective cases when not in use․ Always unplug the machine before handling internal components․ Wear protective gloves if necessary․ Keep sharp objects out of children’s reach․ Regularly inspect parts for damage and replace them if worn or bent․ Proper handling ensures safety and maintains the machine’s performance․ Always refer to the manual for specific guidance on handling sharp components safely․
Setting Up Your Sewing Machine
Unpack and place the machine on a stable surface․ Apply the provided oil to moving parts for smooth operation․ Properly thread the machine as instructed․ Ensure all accessories are securely attached before use․ Follow the manual’s setup guide for optimal performance and safety․
4․1 Unpacking and Initial Setup
Begin by carefully opening the box and verifying all components, including the machine, power cord, presser feet, and accessories․ Place the machine on a stable, flat surface․ Remove any protective packaging materials and inspect for damage․ Apply a few drops of the provided oil to the machine’s moving parts, as indicated in the manual․ Plug in the machine and ensure all controls are in their default positions․ Complete the initial setup by threading the machine and performing a test stitch to ensure proper function․
4․2 Oiling and Lubrication Instructions
Regular oiling is essential to maintain the Singer Curvy sewing machine’s performance․ Locate the oiling points, typically near the bobbin area and moving parts․ Use the provided sewing machine oil, applying a few drops to each specified location․ Gently turn the handwheel to distribute the oil evenly․ Avoid over-lubrication, as it may attract dust and cause damage․ Repeat this process periodically, as recommended in the manual, to ensure smooth operation and extend the machine’s lifespan․
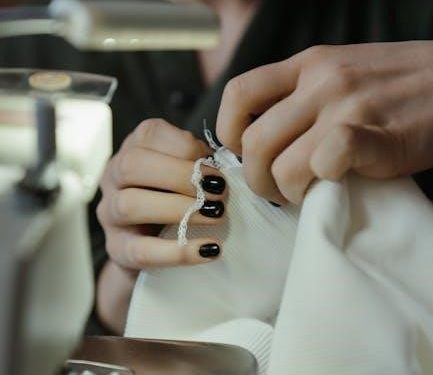
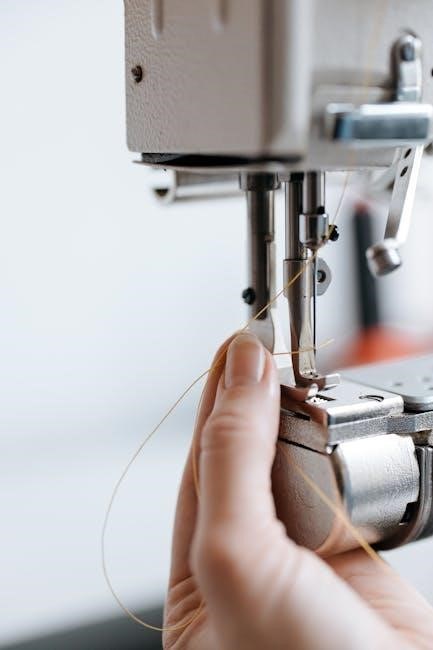
4․3 Threading the Machine
Threading the Singer Curvy sewing machine is made easy with the SwiftSmart Threading System․ Begin by turning the machine on and raising the presser foot․ Gently pull the thread through the designated channels, following the arrows on the machine․ Use the built-in needle threader to guide the thread through the needle’s eye․ Ensure the thread is seated properly in the tension discs and pull gently to remove any slack․ Proper threading is essential for smooth stitching and prevents issues like uneven tension or thread breakage during sewing․
Threading and Bobbin Management
This section covers threading and bobbin management for the Singer Curvy․ Learn to thread efficiently using the SwiftSmart system and manage bobbins for smooth stitching․
5․1 Step-by-Step Threading Guide
Threading your Singer Curvy sewing machine is made easy with the SwiftSmart Threading System․ Start by turning off the machine and locating the spool pin․ Guide the thread through the tension discs, then insert it into the needle bar․ Use the built-in needle threader to simplify the process․ Gently pull the thread to ensure it’s seated properly․ Finally, leave a small excess thread for sewing․ This system ensures accurate threading, reducing frustration and saving time for both beginners and experienced sewists․
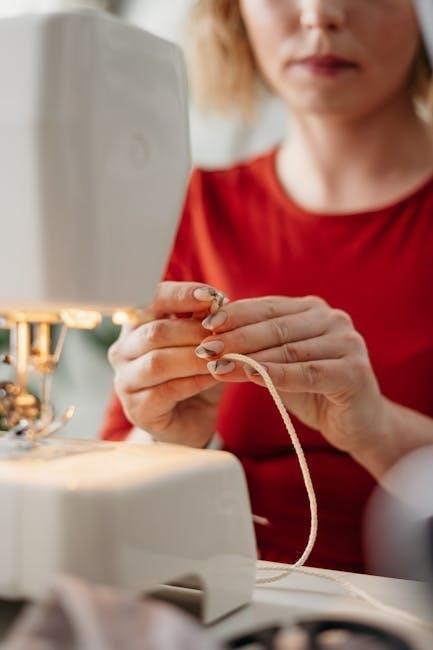
5․2 Winding and Installing the Bobbin
To wind the bobbin, place it on the winder and pull thread from the spool․ Guide the thread through the bobbin tension guide and wind slowly․ Stop when the bobbin is full․ Trim the excess thread and remove the bobbin․ To install, open the bobbin case, insert the bobbin, and pull thread gently to seat it․ Ensure the thread is properly aligned to avoid tangles․ Always use the correct thread type for your fabric․ Refer to the manual’s diagram for precise installation steps to ensure smooth sewing operation․
5․3 Troubleshooting Threading Issues
If the thread does not move smoothly, check for tangles or knots․ Ensure the thread is properly seated in the tension discs and guides․ If the bobbin thread is not catching, verify that the bobbin is correctly installed and the machine is threaded properly․ Use the SwiftSmart Threading System for guidance․ If issues persist, turn off the machine, remove the thread, and restart the threading process․ Always refer to the manual’s diagram for precise threading paths to resolve common threading problems effectively․
Stitch Selection and Customization
The Singer Curvy sewing machine offers a variety of built-in stitches for diverse sewing needs; Customize stitch length and width to suit your fabric type and project requirements․
6․1 Types of Built-in Stitches
The Singer Curvy sewing machine features a variety of built-in stitches, including straight, zigzag, and decorative options․ These stitches cater to different fabric types and sewing projects, ensuring versatility․ The machine includes essential stitches for basic sewing, stretch stitches for knits, and decorative stitches for embellishments․ With 30 built-in stitches, you can choose the perfect one for garments, home decor, or crafts․ This feature-rich design allows for creativity and precision, making it ideal for both beginners and experienced sewists․ Explore the stitch options to enhance your sewing experience․
6․2 Selecting the Right Stitch for Your Fabric
Selecting the right stitch for your fabric is crucial for optimal results․ For cotton and denim, use straight or basic utility stitches․ Knits and stretchy fabrics benefit from zigzag or stretch stitches․ Delicate fabrics like silk or chiffon require finer, more precise stitches․ Heavy-duty fabrics, such as canvas, may need reinforced or heavier-duty stitches․ Always refer to the machine’s guide or manual for specific fabric-stitch recommendations to ensure professional-looking results and prevent damage to your fabric or machine․
6․3 Adjusting Stitch Length and Width
Adjusting stitch length and width on the Singer Curvy sewing machine allows for precise control over your sewing projects․ Use the stitch length dial to set the distance between stitches, ideal for heavier fabrics or delicate materials․ The stitch width adjustment ensures even spacing for decorative or utility stitches․ For most fabrics, a medium setting works well, but heavier materials may require longer stitches, while delicate fabrics need shorter ones․ Always test adjustments on scrap fabric before sewing your final project to achieve the desired results․
Using the Singer Curvy Sewing Machine
Welcome to the Singer Curvy Sewing Machine, designed for ease and versatility․ Start your first project with confidence, sew straight stitches effortlessly, and use reverse stitching for secure seams․
7․1 Starting Your First Sewing Project
Begin by unpacking and setting up your Singer Curvy sewing machine․ Familiarize yourself with the controls and features․ Thread the machine using the SwiftSmart Threading System for ease․ Choose a simple fabric like cotton for your first project․ Select the straight stitch option and adjust the stitch length if needed․ Place your fabric under the presser foot, lower it, and start sewing slowly․ Practice on scrap fabric to build confidence․ Refer to the manual for troubleshooting tips and ensure all safety precautions are followed for a smooth sewing experience․

7․2 Sewing Straight Stitches
To sew straight stitches, select the straight stitch option on your Singer Curvy sewing machine․ Use the stitch selection button to choose the desired stitch․ Thread the machine using the SwiftSmart Threading System for ease․ Place your fabric under the presser foot, ensuring it is aligned properly․ Lower the presser foot and start sewing at a steady pace․ Use the handwheel to guide the fabric smoothly․ For precise results, maintain consistent fabric tension and sewing speed․ Backstitch at the beginning and end of your seam for secure stitching․ Refer to the manual for troubleshooting any issues during the process․
7․3 Sewing in Reverse
To sew in reverse on the Singer Curvy sewing machine, press and hold the reverse stitch button until the machine begins sewing backward․ This feature is useful for reinforcing seams․ Ensure the fabric is properly aligned under the presser foot before starting․ Use the handwheel to gently guide the fabric while sewing in reverse․ Maintain steady pressure to avoid fabric bunching․ Release the button to return to forward sewing․ This function is particularly helpful for securing the beginning and end of seams, ensuring professional-looking results․ Always refer to the manual for specific button locations and troubleshooting tips․
Maintenance and Troubleshooting
Regular cleaning and oiling are essential to keep the Singer Curvy sewing machine in top condition․ Troubleshooting common issues ensures smooth operation and extends machine longevity․
8․1 Cleaning the Machine
Regular cleaning is crucial for maintaining the Singer Curvy sewing machine’s performance․ Turn off and unplug the machine before cleaning․ Use a soft brush to remove lint and debris from the bobbin area, feed dogs, and stitch plate․ Gently wipe the exterior with a dry cloth, avoiding harsh chemicals․ For stubborn dust, a slightly damp cloth may be used, but ensure no moisture enters internal components․ Regular cleaning prevents dust buildup and ensures smooth operation․ Always refer to the manual for specific cleaning instructions tailored to your Singer Curvy model․
8․2 Common Issues and Solutions
Troubleshooting your Singer Curvy sewing machine can resolve common issues quickly․ If the machine doesn’t turn on, check the power cord and ensure it’s properly plugged in․ For uneven stitches, verify that the bobbin is correctly installed and threaded․ Lint buildup can cause poor stitch quality, so clean the machine regularly․ If fabric doesn’t move, ensure the presser foot is lowered․ Consult the manual for specific solutions, and lubricate moving parts periodically to maintain smooth operation․ Addressing these issues promptly ensures optimal performance and extends the machine’s lifespan․
8․3 When to Service the Machine
Regular servicing ensures your Singer Curvy sewing machine operates efficiently․ Service the machine if it produces unusual noises, stitches inconsistently, or has reduced performance․ Clean and lubricate internal parts every 300 hours of use․ Check for lint buildup and remove it to prevent damage․ If issues persist after troubleshooting, consult an authorized Singer service center․ Proper maintenance extends the machine’s lifespan and ensures optimal sewing results․ Refer to the manual for specific servicing guidelines or contact Singer support for professional assistance․
Presser Feet and Accessories
The Singer Curvy sewing machine offers a variety of presser feet, including zipper, buttonhole, and blind hem feet, to enhance your sewing experience․ Additional accessories like specialized needles, bobbins, and spool pins are available to optimize performance and versatility for various projects․
9․1 Types of Presser Feet
The Singer Curvy sewing machine comes with a variety of presser feet to suit different sewing needs․ These include the zipper foot for precise zipper installation, the buttonhole foot for creating perfect buttonholes, and the blind hem foot for invisible hems․ Additional feet like the walking foot and quilting foot are available for specialized tasks․ Each presser foot is designed to enhance stitching accuracy and versatility, allowing you to tackle a wide range of fabrics and projects with ease․ Refer to the manual for details on using and installing these accessories․
9․2 Using Specialized Presser Feet
Specialized presser feet for the Singer Curvy sewing machine enhance your sewing experience by providing precision for specific tasks․ The zipper foot ensures accurate zipper installation, while the buttonhole foot simplifies creating custom buttonholes․ To use these feet, align the foot with the machine’s shank, twist, and secure․ Always refer to the manual for compatibility and installation guidance․ These feet improve control and versatility, allowing you to tackle complex projects with confidence․ Proper use ensures professional-grade results for various fabrics and designs․
9․3 Additional Accessories for Enhanced Sewing
The Singer Curvy sewing machine offers a variety of accessories to enhance your sewing experience․ Essential items include needles, threads, and bobbins, which ensure smooth stitching․ Specialized presser feet cater to specific tasks, while spool pins and sewing notions add convenience․ The machine also features a SwiftSmart Threading System and a built-in needle threader, simplifying setup․ Additional accessories like quilting kits and storage cases help organize your workspace․ These tools and features are designed to make sewing efficient and enjoyable, allowing you to achieve professional-quality results with ease․
Advanced Sewing Techniques
The Singer Curvy sewing machine supports advanced techniques like sewing curves, quilting, and embroidery․ Its features, such as the SwiftSmart Threading System, make intricate stitching effortless and precise․
10․1 Sewing Different Fabric Types
The Singer Curvy sewing machine is versatile for various fabrics, from delicate silk to heavy denim․ Use the appropriate presser feet and adjust stitch settings for optimal results․ For quilting, the machine’s even feed ensures smooth layer handling, while embroidery modes allow intricate designs․ Always test fabric compatibility and tension to achieve professional finishes․ This adaptability makes the Singer Curvy ideal for diverse sewing projects, ensuring precision and ease across different materials․
10․2 Tips for Sewing Curves and Complex Shapes
Sewing curves and complex shapes with the Singer Curvy machine requires precision and the right techniques․ Use the adjustable stitch length and width to maintain even stitching․ Opt for a walking foot or Teflon presser foot for smooth fabric movement․ Pin patterns thoroughly and sew slowly, guiding fabric gently․ For intricate shapes, use stabilizers like interfacing to prevent distortion․ The machine’s free-arm design allows easy maneuvering around curves, ensuring accurate results․ Practice on scrap fabric to refine your skills before working on final projects․
10․3 Using the Machine for Quilting and Embroidery
The Singer Curvy sewing machine is ideal for quilting and embroidery, offering precision and versatility․ Use the free-arm design to easily maneuver large quilts and intricate embroidery patterns․ The machine’s variety of built-in stitches, including decorative options, enhances your creative projects․ For quilting, the walking foot presser foot helps manage thick layers smoothly․ Adjust stitch length and width for detailed embroidery work․ The machine’s speed control ensures steady stitching, making it perfect for both beginners and experienced crafters aiming to create beautiful quilts and embroidery designs with ease․
User Manual Overview
This manual provides a detailed guide to understanding and utilizing the Singer Curvy sewing machine’s features, covering setup, operation, and troubleshooting for optimal sewing experiences․
11․1 Navigating the Manual
The Singer Curvy sewing machine manual is organized into clear sections, making it easy to find information․ Start with the table of contents to locate specific topics․ Each section is labeled with headings and subheadings for quick reference․ Use the index to search for keywords or specific features․ Visual diagrams and illustrations are included to help understand complex parts and functions․ For new users, begin with the setup and threading guides before exploring advanced features․ Refer to the glossary for definitions of sewing terms to enhance your understanding․
11․2 Understanding Symbols and Icons
The Singer Curvy sewing machine manual uses symbols and icons to convey important information quickly․ Common symbols include a warning triangle for safety alerts and a wrench for maintenance instructions․ These visuals help users identify key steps or precautions at a glance․ The manual also provides a reference section explaining each symbol in detail․ Familiarize yourself with these icons to better understand the instructions and ensure safe, effective use of your machine․ This visual guide enhances your sewing experience by making complex information easy to digest․
11․3 Glossary of Terms
The glossary of terms in the Singer Curvy sewing machine manual serves as a quick reference for understanding technical terms and sewing jargon․ It defines key phrases like “tension,” “bobbin,” and “stitch length” to ensure clarity․ This section is particularly helpful for new users unfamiliar with sewing terminology․ By reviewing the glossary, you can better comprehend the instructions and troubleshoot common issues․ It’s a valuable resource for both beginners and experienced sewists, enhancing your overall understanding of the machine and its functions․ This section is designed to make your sewing journey smoother and more enjoyable․
Warranty and Support
Your Singer Curvy sewing machine comes with a comprehensive warranty, ensuring coverage for parts and labor․ For support, contact Singer’s customer service or visit authorized service centers for assistance and repairs, ensuring your machine remains in optimal condition․ This section provides details on warranty terms, support options, and service locations to help you maintain your sewing machine effectively․
12․1 Understanding Your Warranty
Your Singer Curvy sewing machine is backed by a comprehensive warranty that covers parts and labor for a specified period․ This warranty ensures protection against manufacturing defects, providing peace of mind for your investment․ To maintain warranty validity, ensure proper machine usage and adhere to the guidelines outlined in this manual․ For detailed warranty terms, refer to the documentation provided with your purchase or contact Singer’s customer support for clarification and assistance․ Understanding your warranty helps you utilize the support available to keep your machine in optimal condition․ Always register your product to activate warranty benefits fully․
12․2 Contacting Singer Customer Support
For assistance with your Singer Curvy sewing machine, contact Singer’s customer support team via phone, email, or live chat․ Visit the Singer website for contact details and support hours․ Ensure you have your machine’s serial number ready for efficient service․ The support team can address warranty claims, repair inquiries, and technical questions․ Additionally, Singer’s website offers a wealth of resources, including FAQs, troubleshooting guides, and user manuals, to help you resolve issues independently․ Reach out to Singer’s support for reliable and prompt assistance with your sewing machine needs․
12․3 Finding Authorized Service Centers
To locate an authorized Singer service center, visit the Singer website and use the service center locator tool․ Enter your location to find nearby centers․ These centers provide genuine parts, repairs, and maintenance for your Singer Curvy sewing machine․ Ensure your machine is serviced by authorized professionals to maintain warranty validity and performance․ Contact Singer customer support for assistance in finding the nearest center․ Regular servicing at authorized centers ensures optimal machine performance and extends its lifespan․