
A 20-minute guided meditation script offers a perfect balance for busy schedules, providing deep relaxation and mindfulness. It helps reduce stress and anxiety, promoting inner peace and focus through structured techniques like body scans, breath focus, and visualization, making it ideal for both beginners and experienced practitioners.
1.1 Understanding the Purpose of a 20-Minute Meditation
The purpose of a 20-minute guided meditation is to provide a concise yet effective practice for reducing stress, deepening mindfulness, and enhancing relaxation. This duration allows individuals to transition smoothly from a busy state to a calm, focused mindset. It is designed to accommodate schedules, offering a practical way to incorporate mindfulness into daily life. The script typically includes grounding techniques, breath focus, and visualization, creating a balanced experience. By dedicating just 20 minutes, participants can cultivate greater self-awareness, improve emotional regulation, and recharge mentally. This structured approach ensures that even those with limited time can experience the profound benefits of meditation, making it an accessible tool for overall well-being.

1.2 Benefits of Using a Guided Script
Using a guided meditation script offers numerous benefits, particularly for those seeking structure and accessibility. It provides clear instructions, ensuring a smooth and focused practice, which is especially helpful for beginners. The script helps reduce stress and anxiety by guiding the mind toward relaxation and mindfulness. It also enhances focus and concentration, allowing practitioners to stay present without distractions. Additionally, a guided script creates a safe and comforting space for exploring emotions and thoughts. Regular use can improve emotional regulation and overall well-being. The structured format of a 20-minute guided meditation script makes it easy to incorporate into daily routines, promoting consistency and long-term benefits for both mental and emotional health.
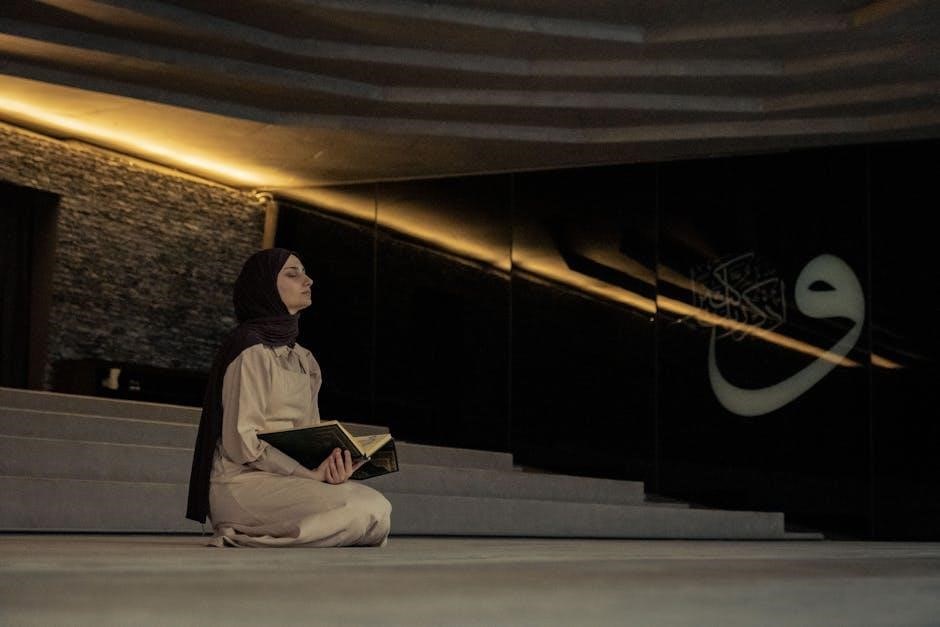
1.3 How to Prepare for the Meditation Session
Preparing for a 20-minute guided meditation involves creating a calm and conducive environment. Find a quiet, comfortable space where you can sit or lie down without distractions. Adjust your position to support your spine, ensuring relaxation. Turn off electronic devices or put them on silent mode to minimize interruptions. Dim the lights or use soft lighting to set a peaceful mood. Consider playing soothing background music if it enhances your focus. Have a glass of water nearby and tissues for comfort. Close your eyes and take a few deep breaths to signal the start of your practice. Ensure you have the guided meditation script ready, either printed or on a device. Commit to the full 20 minutes, allowing yourself to fully immerse in the experience without rushing. Consistency and patience are key to maximizing the benefits of this practice.

Grounding and Relaxation Techniques
Grounding techniques, such as deep breathing and body scans, help calm the mind and body. These methods enhance presence, reduce tension, and promote a peaceful state of being.
2.1 Body Scan Meditation for Deep Relaxation
A body scan meditation is a grounding technique that involves lying down or sitting comfortably, focusing on deep breathing, and systematically scanning the body from head to toe. This practice helps identify and release physical tension, fostering deep relaxation. By bringing awareness to each body part, individuals can let go of stress and cultivate a sense of calm. The meditation typically lasts 10-15 minutes, making it an ideal component of a 20-minute guided meditation script. Regular practice enhances mindfulness, improves sleep quality, and reduces overall anxiety. It is accessible to both beginners and experienced practitioners, offering a powerful tool for reconnecting with the body and promoting inner peace.
2.2 Breath Focus and Its Role in Mindfulness

Focusing on the breath is a cornerstone of mindfulness practices, often incorporated into 20-minute guided meditation scripts. By concentrating on the sensation of air entering and leaving the nostrils, or the rise and fall of the chest, individuals anchor their attention in the present moment. This technique helps quiet the mind, reducing mental chatter and stress. Regular breath focus practice enhances concentration, emotional regulation, and overall well-being. It is particularly effective for beginners, as it provides a clear and accessible anchor for meditation. Over time, this practice cultivates a greater sense of awareness and calm, making it a essential component of any mindfulness routine.
2;3 Grounding Exercises to Enhance Presence
Grounding exercises are essential for enhancing presence during meditation, helping individuals connect with the physical body and the environment. Techniques like deep breathing, body awareness, and sensory focus anchor the mind in the present moment. For instance, noticing the feet’s contact with the ground or the sensations of the breath cultivates a sense of stability. These practices reduce mental wandering and foster a deeper connection to one’s body and surroundings. Regular grounding exercises in a 20-minute guided meditation script promote emotional balance, reduce anxiety, and enhance overall mindfulness. By incorporating grounding, meditators can more easily transition into a state of calm and focused awareness, making their practice more effective and rejuvenating.

Visualization and Imagery in Meditation
Visualization engages the mind, creating mental sanctuaries for inner peace. It reduces stress and enhances relaxation, guiding practitioners to vivid, calming scenarios that deepen mindfulness and emotional balance.

3.1 The Power of Visualization for Inner Peace
Visualization is a potent tool for achieving inner peace, allowing individuals to mentally escape to serene environments. By imagining calming landscapes, such as beaches or forests, the mind disengages from stress, fostering deep relaxation. This technique not only reduces anxiety but also enhances emotional balance, helping practitioners reconnect with their inner selves. Regular visualization practice within a 20-minute guided meditation script can lead to sustained calm and clarity, making it easier to navigate life’s challenges with mindfulness and poise. The structured guidance ensures a focused journey, maximizing the benefits of this transformative practice for overall well-being.
3.2 Creating a Mental Sanctuary Through Imagery
Imagery is a powerful method for crafting a mental sanctuary, a safe space where you can retreat from stress and chaos. By vividly visualizing a serene environment—such as a tranquil beach, a lush forest, or a cozy cabin—you create a personal haven. This imaginary refuge is tailored to your preferences, allowing you to immerse yourself in calming sights, sounds, and sensations. The 20-minute guided meditation script gently guides you through this process, helping you envision every detail, from the warmth of the sun on your skin to the soothing sounds of nature. This practice not only provides immediate relaxation but also fosters emotional balance and clarity, enabling you to return to your daily life with renewed energy and peace of mind.
3.3 Guided Visualizations for Stress Relief
Guided visualizations are a cornerstone of stress relief in meditation, offering a mental escape from daily pressures. The 20-minute guided meditation script employs vivid imagery to transport you to calming scenarios, such as a serene beach or a peaceful forest, where you can let go of tension. By focusing on sensory details—like the sound of waves or the warmth of sunlight—your mind disengages from stressors, fostering deep relaxation. These visualizations not only reduce anxiety but also cultivate mindfulness, allowing you to reconnect with your inner calm. Regular practice strengthens your ability to manage stress effectively, providing a mental sanctuary accessible anytime, and enhancing overall emotional well-being through consistent use of this technique. This method is particularly effective for its ability to create a sense of control and peace, even in chaotic environments.
A 20-minute guided meditation script is a powerful tool for fostering mindfulness and relaxation. Regular practice enhances emotional well-being, reduces stress, and cultivates inner peace. Embrace consistency to deepen your mindfulness journey and experience lasting benefits, transforming your daily life with greater calm and clarity. Gratitude and self-compassion are key to sustaining this practice, ensuring a fulfilling and enriching meditation experience. This structured approach makes mindfulness accessible and impactful, providing a foundation for long-term mental and emotional health. By incorporating this script into your routine, you invest in your well-being and create a pathway to a more centered, joyful life. Consistency is key to unlocking its full potential and enjoying the profound benefits it offers.
4.1 Wrapping Up the Meditation Session
As the 20-minute guided meditation concludes, gently guide participants back to awareness. Instruct them to slowly open their eyes, taking deep breaths to fully return to the present. Acknowledge the time invested in self-care and encourage gratitude for the body’s calm state. Remind them to carry the sense of relaxation and clarity into their day. Offer a closing affirmation, such as, “May you remain at ease and present,” fostering a nurturing mindset. This final step ensures a smooth transition, leaving participants refreshed and ready to embrace life with renewed energy and mindfulness.
4.2 Reflecting on the Experience
After completing the 20-minute guided meditation, take a moment to reflect on the journey. Notice any shifts in bodily sensations, emotional states, or mental clarity. Acknowledge insights or feelings that arose during the practice. Reflecting helps integrate the benefits of meditation into daily life. Consider journaling key observations to track progress over time. This step fosters self-awareness and reinforces the mindfulness cultivated during the session. By pausing to reflect, participants deepen their understanding of their inner experiences, fostering personal growth and emotional resilience. Gratitude for the time spent in meditation can further enhance the positive impact of the practice, encouraging a compassionate and present-minded approach to life.
4.3 Encouraging Consistency in Practice
Consistency is key to experiencing the full benefits of meditation. Encourage setting aside 20 minutes daily for practice, even if it means adjusting schedules slightly. Creating a calming environment and sticking to a routine helps build a lasting habit. Using a guided meditation script regularly ensures structure and focus, making it easier to maintain discipline. Tracking progress through journaling or apps can also motivate continued practice. Celebrate small milestones, like completing a week of daily sessions, to reinforce commitment. Over time, consistency will deepen mindfulness, reduce stress, and enhance overall well-being. Remind yourself that every moment spent in meditation is an investment in mental and emotional health.