Log Cabin Quilt Tutorial: A Comprehensive Guide
Embark on a quilting journey! This tutorial explores the Log Cabin pattern’s rich history, dating back to the 1860s, initially utilizing silk patchwork before becoming popular with cottons.
Welcome to the captivating world of the Log Cabin Quilt! This iconic pattern, a cornerstone of American quilting history, offers a beautiful blend of simplicity and versatility. The Log Cabin quilt, instantly recognizable, is more than just a visually appealing design; it’s a testament to resourcefulness and creativity, born from the traditions of early American settlers.
Historically, the Log Cabin block emerged prominently during the mid-19th century, specifically around the 1860s, coinciding with the Civil War era. Initially, it was a favored technique for working with luxurious silk patchwork, but its adaptability quickly led to widespread adoption using more accessible cotton fabrics. This transition made the pattern available to a broader range of quilters.
The beauty of the Log Cabin lies in its construction – strips of fabric, resembling logs building a cabin, are added around a central square. This method is incredibly forgiving, making it perfect for utilizing fabric scraps and creating unique, personalized quilts. Whether you’re a seasoned quilter or a beginner, the Log Cabin quilt offers a rewarding and fulfilling project. This tutorial will guide you through every step, from fabric selection to the final binding, unlocking the secrets to creating your own heirloom-quality Log Cabin masterpiece.
Historical Background of the Log Cabin Pattern
The Log Cabin pattern boasts a rich and fascinating history, deeply intertwined with American pioneering life and resourcefulness. While pinpointing the exact origin remains elusive, references to the design appear as early as the 1860s, gaining significant traction during the Civil War period. Initially, the pattern wasn’t crafted from cotton, but rather from luxurious silk patchwork, showcasing intricate designs and skilled craftsmanship.
However, the pattern’s true democratization occurred with the adoption of cotton fabrics. This shift made Log Cabin quilts accessible to a wider range of quilters, particularly those on the frontier. The design cleverly mirrored the construction of log cabins themselves – a symbol of home and security for settlers.
During the war, Log Cabin quilts served a practical and patriotic purpose, often being created and sold as fundraisers for Union hospitals. Later, in the late nineteenth century, quilters began utilizing foundation piecing techniques, combining velvets, wools, and satins onto muslin bases for opulent results. Throughout the 19th and 20th centuries, the Log Cabin continued to evolve, reflecting changing fabric styles and quilting trends, solidifying its place as a timeless classic.
The Symbolism Behind the Log Cabin Design
Beyond its aesthetic appeal, the Log Cabin quilt pattern carries profound symbolic weight, deeply rooted in the experiences of early American settlers. The most prominent symbolism lies in its representation of “home” – mirroring the construction of the log cabins that provided shelter and security on the frontier. Each “log” added to the block symbolized the building of a life, piece by piece, in a new and often challenging environment;
The central square, often red, was interpreted as the hearth – the heart of the home, representing warmth, family, and hospitality. Variations in color placement also held meaning. A dark center could symbolize a difficult life, while a light center represented hope and prosperity.
Furthermore, the pattern became associated with the Underground Railroad. It is believed that certain color arrangements and block placements served as coded messages to guide escaping slaves to freedom. While the extent of this symbolism is debated, it adds another layer of historical significance to this beloved quilt design. The Log Cabin, therefore, is more than just a quilt; it’s a visual narrative of resilience, hope, and the American spirit.
Materials Needed for a Log Cabin Quilt
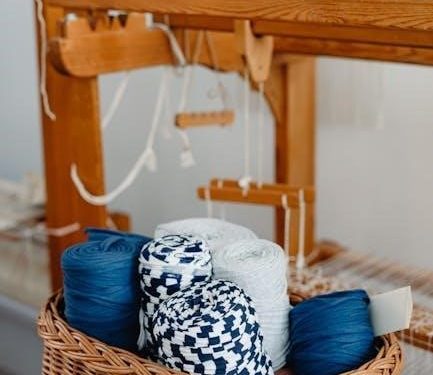
To begin your Log Cabin quilt journey, gathering the right materials is crucial for a successful and enjoyable experience. First, you’ll need a selection of fabrics – cotton is the most common choice, but feel free to experiment with velvets, wools, or silks for a unique touch, reflecting historical practices. Consider a variety of colors and textures to bring your design to life.
Essential tools include a rotary cutter, cutting mat, and quilting ruler for precise fabric cuts. A sewing machine is, of course, indispensable, along with matching thread. If you plan to use foundation paper piecing, you’ll also require foundation paper and a printer to create the templates.
Other helpful supplies include an iron and ironing board for pressing seams, pins to hold fabric layers together, and a seam ripper for those inevitable mistakes! Don’t forget batting for the quilt’s inner layer and backing fabric to complete the quilt sandwich. Finally, binding fabric will provide a neat and finished edge.
Fabric Selection: Colors and Textures

Choosing fabrics is where your Log Cabin quilt truly comes to life! Historically, quilters utilized fabric scraps readily available, including silk, wool, and cotton, resulting in diverse textures. Embrace this tradition by mixing different materials for a visually rich quilt. Consider the overall aesthetic you desire – a warm and cozy feel, a bold and modern statement, or a vintage charm.
Color selection is equally important. Traditional Log Cabin quilts often featured dark fabrics representing the hearth and light fabrics symbolizing hope. However, modern quilters enjoy boundless freedom. Play with contrasting colors to emphasize the block’s structure, or opt for a monochromatic scheme for a subtle elegance.
Don’t be afraid to incorporate prints and patterns, but balance them with solids to avoid overwhelming the design. Think about the story you want your quilt to tell through color and texture. Scrappy quilts, utilizing a wide range of fabrics, are a beautiful way to showcase your creativity and resourcefulness.
Cutting the Fabric: Precise Measurements
Accuracy is paramount when cutting fabric for a Log Cabin quilt! This pattern relies on precise measurements to ensure the blocks fit together seamlessly. Begin by carefully reading your chosen pattern and noting the required dimensions for each “log” or strip of fabric. A rotary cutter, quilting ruler, and cutting mat are essential tools for achieving clean, accurate cuts.
Typically, Log Cabin blocks are constructed using strips of varying widths. Common widths include 1 inch, 1.5 inches, or 2 inches, but these can be adjusted to create different block sizes. Cut strips longer than needed, as they can be trimmed later. Consistency is key – ensure all strips of the same width are cut to the same length.
Labeling your cut strips can prevent confusion, especially when working with multiple colors or fabrics. Double-check your measurements before cutting, and take your time. Inaccurate cuts can lead to distorted blocks and frustration during assembly. Precise cutting lays the foundation for a beautiful, well-constructed Log Cabin quilt.

Traditional Log Cabin Block Construction

The classic Log Cabin block is built around a central square! This core, often a contrasting color, represents the hearth of the cabin. Begin by sewing strips of fabric – the “logs” – around this center square, one at a time. Traditionally, alternating dark and light fabrics create a visually striking effect, symbolizing the challenges and comforts of pioneer life.
Each log is sewn to the previous one, building outwards in a spiral fashion. Press each seam open or to one side, maintaining consistent pressing direction throughout the block. Accuracy is crucial; ensure the logs are aligned and the seams are secure. As you add logs, the block will grow, resembling a miniature log cabin.
Pay attention to the grain of the fabric, as it can affect the block’s stability. Rotate the block as you sew to distribute the fabric’s bias. Once all logs are attached, trim the block to the desired size, ensuring all edges are square. This traditional method yields a timeless and charming Log Cabin block.
Foundation Paper Piecing Technique
Foundation paper piecing (FPP) offers precision for Log Cabin blocks! This method involves sewing fabric onto a paper template, providing a stable base and accurate seam allowances. Begin with a pre-printed paper template, divided into sections representing each “log” of the cabin.
Cut fabric slightly larger than each section on the template. Apply fabric to the designated area on the paper, right side up, and secure with pins. Flip the paper over and sew along the drawn line, joining the fabric to the previous piece. Repeat this process, adding each log one by one, always sewing on the paper side.
FPP allows for intricate designs and precise fabric placement. Once all logs are sewn, carefully remove the paper template. This technique is particularly useful when working with challenging fabrics like velvets or silks, as seen in late 19th-century quilts. It ensures a flat, accurate block, perfect for complex Log Cabin variations.
Variations of the Log Cabin Block
Beyond the traditional form, the Log Cabin block blossoms with endless variations! While the classic design features light and dark fabrics creating a central square, quilters have creatively adapted this pattern for centuries. One popular variation involves shifting the central square off-center, creating a dynamic visual effect.
Explore color variations – monochromatic schemes, vibrant rainbow palettes, or subtle gradations. Experiment with fabric textures, incorporating silks, velvets, and cottons, mirroring the techniques used in late 19th-century quilts. Consider using different widths for the “logs,” creating asymmetrical designs.
Further embellishments include adding appliqué elements or incorporating embroidery. Some quilters create “crumb” quilts, using tiny fabric scraps to fill the logs, adding texture and visual interest. The Log Cabin’s adaptability makes it a favorite among quilters, allowing for personalized expressions and unique heirloom pieces.
Log Cabin Quilt Layout Options
Once your Log Cabin blocks are complete, the layout possibilities are truly expansive! Traditional layouts often feature a grid arrangement, showcasing the blocks in a uniform and balanced manner. However, don’t limit yourself – explore alternative arrangements for a unique aesthetic.
Consider a diagonal layout, creating a sense of movement and visual energy. A medallion layout, with a central Log Cabin block surrounded by borders and complementary blocks, adds grandeur. Random layouts, while requiring careful planning, offer a more contemporary and eclectic feel.
Play with block rotation, turning some blocks on point (diagonally) to create secondary patterns. Experiment with setting triangles or squares between the blocks to alter the overall design. Remember to consider the visual weight of the light and dark fabrics when arranging your layout, ensuring a balanced and harmonious composition.
Bordering the Log Cabin Quilt
Adding a border to your Log Cabin quilt is the perfect way to frame your beautiful blocks and complete the overall design. Borders not only enhance the visual appeal but also provide stability and a finished look.
Simple borders, using a single fabric, are a classic choice, allowing the Log Cabin blocks to remain the focal point. Consider a coordinating solid color or a subtle print that complements the quilt’s palette. For a more elaborate effect, explore multiple borders – a narrow inner border followed by a wider outer border.
Log Cabin borders, constructed using the same block pattern but scaled down, create a cohesive and visually interesting frame. Pieced borders, incorporating different fabrics and shapes, add texture and personality. Ensure your borders are accurately measured and consistently applied to maintain a professional finish. A well-chosen border elevates your quilt from beautiful to breathtaking!

Quilting Designs for Log Cabin Quilts
The quilting design you choose significantly impacts the final look of your Log Cabin quilt. It’s an opportunity to enhance the block’s structure and add texture and visual interest.
Straight-line quilting, following the “logs” within each block, is a popular and effective choice. This method emphasizes the geometric design and creates a clean, modern aesthetic. Alternatively, echo quilting around the blocks defines each one and adds subtle dimension. For a more intricate look, consider free-motion quilting with floral or geometric motifs.
Custom quilting designs, tailored to the specific layout of your quilt, allow for creative expression. Feathering, swirls, and stippling can fill the background spaces beautifully. Remember to consider the density of your quilting – denser quilting provides more warmth and texture, while sparse quilting showcases the fabric and block design. Experiment and find a quilting style that complements your Log Cabin masterpiece!
Binding the Quilt: Finishing Touches
Binding is the final, crucial step in completing your Log Cabin quilt, providing a neat and durable edge while enhancing its overall appearance. It encases the raw edges of the quilt top, batting, and backing, preventing fraying and adding a polished finish.
Typically, binding is created from strips of fabric cut on the bias (45-degree angle) for flexibility, especially around curves. Straight-grain binding is suitable for quilts with straight edges. Attach the binding to the quilt using a machine or hand-sewing technique. Machine binding is faster, while hand binding offers a more refined, heirloom quality.
Several binding methods exist, including single-fold and double-fold. A double-fold binding encases the raw edges completely, offering a clean finish. Miter the corners neatly for a professional look. Secure the binding to the back of the quilt with invisible stitches or machine quilting. Your beautifully crafted Log Cabin quilt is now ready to be cherished for generations!
Caring for Your Log Cabin Quilt
Preserving your cherished Log Cabin quilt requires gentle care to maintain its beauty and longevity. Proper storage and cleaning are essential to protect the fabric and stitching from damage.
Avoid direct sunlight, as it can fade the colors over time. Store the quilt in a breathable cotton bag or acid-free box when not in use, protecting it from dust and pests. Regularly air out the quilt to prevent mildew. When washing is necessary – and it should be infrequent – hand wash in cool water with a mild detergent designed for delicate fabrics.
Avoid harsh chemicals, bleach, and vigorous scrubbing. Gently squeeze out excess water and lay flat to dry, away from direct heat. Iron on a low setting, using a pressing cloth to protect the fabric. With proper care, your Log Cabin quilt will remain a treasured heirloom for years to come, a testament to your craftsmanship and a piece of history.
Resources for Further Learning and Inspiration
Expand your quilting knowledge and discover new creative avenues with these valuable resources! Numerous online platforms offer detailed Log Cabin quilt tutorials, pattern variations, and helpful tips for quilters of all skill levels. Websites dedicated to quilting often feature blogs, forums, and video demonstrations showcasing different techniques.
Explore quilting books and magazines for a wealth of inspiration, including historical context and contemporary designs. Local quilt guilds and workshops provide opportunities to learn from experienced quilters and connect with a vibrant community. Museums with textile collections often display antique Log Cabin quilts, offering insight into the pattern’s evolution.
Don’t forget to explore online marketplaces for fabric, patterns, and quilting supplies. Social media platforms like Pinterest and Instagram are brimming with stunning Log Cabin quilt examples, providing endless inspiration for your own projects. Embrace the quilting community and continue to learn and grow!