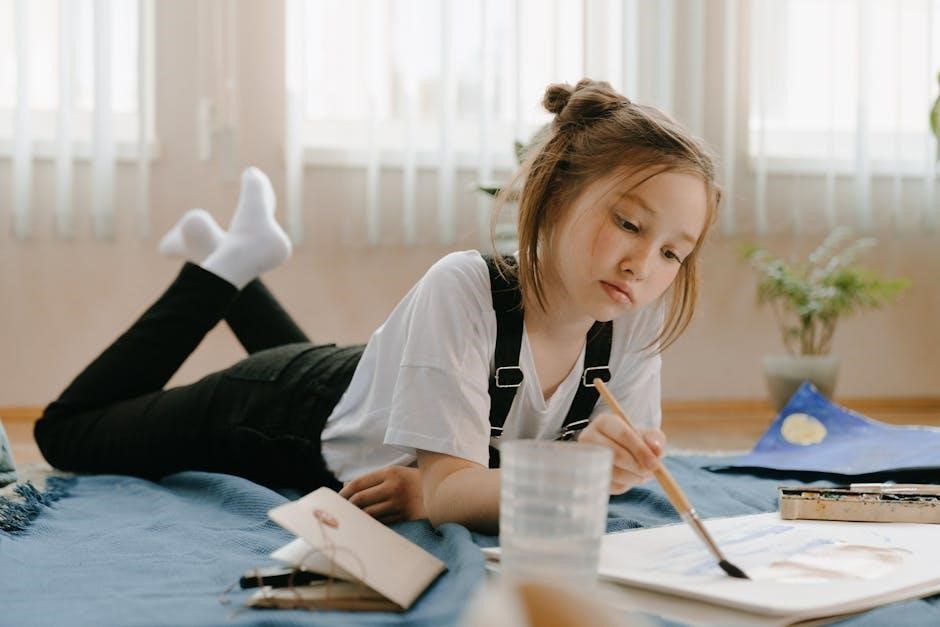
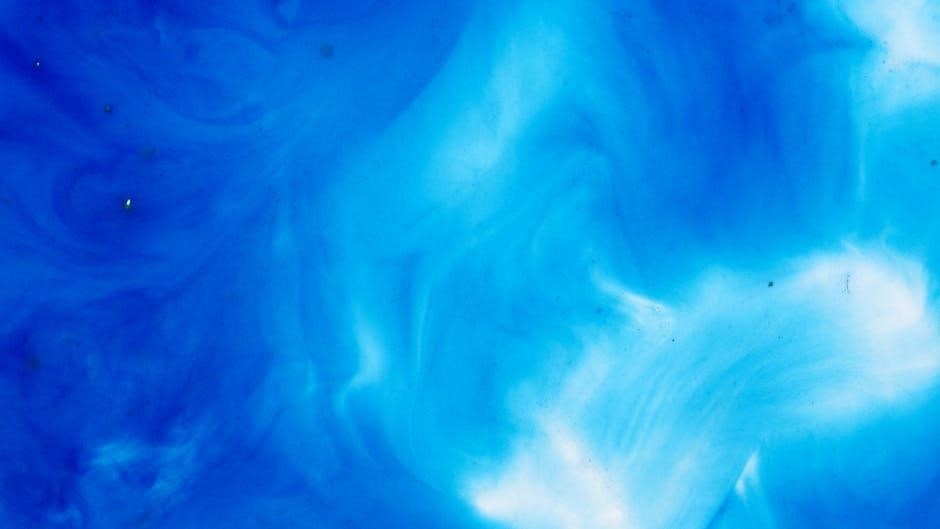
inkbird controller manual

The InkBird Controller is a smart temperature control device designed for precise monitoring and management of your grill or smoker via Wi-Fi or Bluetooth connectivity. It enhances cooking efficiency and consistency, making it ideal for both home and professional use.

1.1 Overview of the InkBird Controller and Its Importance

The InkBird Controller is a smart device designed for precise temperature monitoring and control of grills and smokers. It enhances cooking efficiency and consistency, making it ideal for both home cooks and professional pitmasters. Its versatility allows for use in various setups, including fermentation chambers, showcasing its adaptability. This device is crucial for achieving perfect results in modern cooking, ensuring optimal performance across different applications.

1.2 Key Features of the InkBird Controller

The InkBird Controller offers dual probe support for monitoring both meat and grill temperatures, ensuring precise control. It features Wi-Fi and Bluetooth connectivity for remote monitoring via a smartphone app. Customizable PID tuning allows for tailored temperature regulation, while its durable design ensures long-term reliability. The controller also supports various cooking methods, making it versatile for grills, smokers, and even fermentation chambers.

Installation and Setup Guide

The InkBird Controller installation involves unboxing, connecting probes, and powering on the device. Mount it near your grill for easy access and ensure proper ventilation for optimal performance.

2.1 Unboxing and Preparing the Controller

When unboxing the InkBird Controller, carefully inspect all components, including the main unit, temperature probes, and power adapter. Ensure no damage is present. Before use, charge the controller if necessary and familiarize yourself with its buttons and ports. Mount the controller securely near your grill, ensuring proper ventilation to prevent overheating and maintain accuracy.

2.2 Connecting the Controller to Your Grill or Smoker

Begin by connecting the temperature probes to the controller’s designated ports. Ensure the probes are securely attached to your grill or smoker. Power on the device and select the appropriate input for your setup. Use the InkBird app to configure initial settings and pair the controller with your grill. Test the connection by adjusting temperatures and monitoring responses to confirm proper functionality.

Understanding the Interface and Controls

The controller features an intuitive interface with a clear display and buttons for easy navigation. Use the buttons to adjust settings, monitor temperatures, and access advanced features.

3.1 Navigating the Controller’s Display and Buttons

The InkBird Controller’s display provides real-time temperature readings, while the buttons allow easy navigation between modes. The up and down arrows adjust settings, and the menu button accesses advanced options like PID tuning. The interface is user-friendly, ensuring seamless control over your cooking process. Proper navigation ensures optimal performance and precise temperature management for consistent results.

3.2 Setting Up Temperature and Timer Functions

Setting up temperature and timer functions on the InkBird Controller is straightforward. Use the arrow buttons to set your desired temperature and timer. The controller will maintain the set temperature, ensuring your meat cooks evenly. You can also program custom profiles for specific cuts of meat or cooking methods, enhancing your culinary experience with precision and ease.

Connecting to Wi-Fi and Bluetooth

Connect the InkBird Controller to your Wi-Fi or Bluetooth for seamless smartphone app integration. This enables remote temperature monitoring and real-time updates, enhancing your cooking experience.

4.1 Pairing the Controller with Your Smartphone App

Download and install the InkBird app from the App Store or Google Play. Ensure Bluetooth is enabled on your smartphone. Open the app, select the InkBird controller model, and follow the on-screen instructions to complete the pairing process. Once connected, you can monitor temperature, adjust settings, and receive notifications remotely, enhancing your grilling experience with convenient control.

4.2 Troubleshooting Connectivity Issues

If you encounter connectivity problems, ensure the controller is in range of your device. Restart both the controller and your smartphone, then retry pairing. Check that Bluetooth is enabled and no other devices are interfering. If issues persist, reset the controller by pressing and holding the power button for 10 seconds. Ensure the firmware is up-to-date, as outdated versions can cause connectivity problems. Consult the user manual or contact support for further assistance.

Monitoring and Controlling Temperature

The InkBird Controller allows precise temperature monitoring using meat probes, ensuring real-time data for optimal cooking. It maintains consistent grill temperatures, reducing fluctuations for perfect results every time.

5.1 Using Probes to Monitor Meat and Grill Temperature

The InkBird Controller comes with temperature probes to monitor both meat and grill temperatures simultaneously. These probes provide real-time data, ensuring your meat reaches the perfect internal temperature while maintaining consistent grill heat. Simply connect the probes to the controller, set your desired temperatures, and track progress through the app. This feature prevents overcooking and ensures evenly cooked results every time.

5.2 Adjusting Settings for Optimal Cooking Performance

To optimize your cooking experience with the InkBird Controller, start by selecting the appropriate temperature range for your specific cooking method, such as smoking or grilling. Adjust the PID settings to fine-tune temperature stability, ensuring consistent heat levels. Preheat your grill to the desired temperature before adding meat for even cooking. Enable notifications via the app to stay informed about temperature changes. Explore different cooking modes and customize settings based on your grill’s unique characteristics for the best results.

Firmware Updates and Maintenance

Firmware updates enhance performance and fix issues. Regularly check for updates via Wi-Fi. Clean the controller to prevent dust buildup and ensure optimal functionality over time.

6.1 Updating the Controller’s Firmware

To update the firmware, connect the controller to Wi-Fi; Open the app, navigate to settings, and select “Firmware Update.” Follow on-screen instructions to download and install the latest version. Ensure the device remains powered on and connected throughout the process. Updates improve functionality, fix bugs, and add new features for optimal performance. Regular updates are essential for maintaining your controller’s efficiency and security.

6.2 Regular Maintenance Tips for Longevity

Regularly clean the controller’s exterior and internal components to prevent dust buildup. Protect it from direct sunlight and moisture. Check probe accuracy periodically and replace worn-out parts. Store the controller in a dry place when not in use. Avoid extreme temperature exposure to maintain optimal performance and extend its lifespan. Proper care ensures reliability and durability for consistent cooking results over time.

Troubleshooting Common Issues

This section addresses frequent problems like temperature fluctuations and connectivity issues, offering practical solutions to ensure smooth operation and optimal performance of your InkBird Controller.

7.1 Resolving Temperature Fluctuations

Temperature fluctuations can be caused by improper probe placement or PID settings. Ensure probes are correctly positioned, and calibrate them if necessary. Adjusting PID parameters can stabilize temperatures. Restarting the controller may also resolve minor glitches. For persistent issues, refer to custom PID tuning guides or contact support for assistance.

7.2 Fixing Connectivity and Display Problems

Connectivity issues, such as Bluetooth not connecting or the app not detecting the device, can often be resolved by restarting both the controller and your smartphone. Ensure Bluetooth is enabled and your phone is in range. For display problems, check brightness settings or ensure no loose connections. If issues persist, reset the controller to factory settings or update the firmware for improved performance.

Advanced Features and Customization

The InkBird Controller offers advanced customization options, including custom PID tuning for precise temperature control and the ability to create specific profiles for different meats and cooking styles.

8.1 Custom PID Tuning for Precision Control

Custom PID tuning allows users to fine-tune the InkBird Controller’s performance for precise temperature regulation. By adjusting proportional, integral, and derivative parameters, you can optimize the controller’s response to temperature changes. This feature is especially useful for advanced users seeking to customize their cooking experience. The process involves understanding the system’s dynamics and making incremental adjustments to achieve stable and accurate temperature control. The InkBird app provides tools to simplify this process, ensuring optimal results for various cooking scenarios.

8.2 Using the InkBird Controller for Different Cooking Methods

The InkBird Controller is versatile, supporting various cooking methods like smoking, grilling, and sous vide. It works seamlessly with pellet grills, kamados, and even DIY setups. Users can adapt the controller to different cooking styles by adjusting settings via the app. Whether you’re slow-cooking brisket or maintaining precise temps for fermentation, the InkBird Controller offers flexibility and precision, making it a valuable tool for diverse culinary applications.

Safety Precautions and Warranty Information

Always follow safety guidelines to avoid electrical hazards or damage. Keep the controller away from direct heat, moisture, and flammable materials for optimal performance and longevity.

The InkBird Controller is backed by a warranty covering manufacturing defects. Contact customer support for assistance with repairs or replacements within the specified warranty period.

9.1 Safety Guidelines for Using the Controller

Ensure the InkBird Controller is installed in a well-ventilated area, away from direct heat sources and flammable materials. Avoid exposing it to moisture or extreme temperatures to prevent damage and electrical hazards. Regularly inspect the device and probes for wear or damage. Always unplug the controller before cleaning or performing maintenance to ensure safety and longevity of the device. Follow the manufacturer’s guidelines for proper usage and handling to avoid any potential risks associated with its operation. Never submerge the controller in water or subject it to harsh chemicals, as this can cause irreversible damage. By adhering to these safety precautions, you can ensure a safe and efficient cooking experience with your InkBird Controller. The device is designed to enhance your grilling or smoking sessions, providing precise temperature control and real-time monitoring through its user-friendly interface. Always keep the controller out of reach of children and pets to prevent accidental tampering. In case of any malfunction or unexpected behavior, disconnect the power immediately and contact customer support for assistance. Proper handling and care will extend the lifespan of your InkBird Controller and ensure it continues to perform optimally for all your cooking needs. Additionally, be mindful of the power source and avoid overloading circuits, as this can lead to electrical issues. The InkBird Controller is a valuable tool for achieving perfect results in your culinary endeavors, but it requires responsible usage to maintain safety and functionality. Always refer to the user manual for specific safety recommendations tailored to your model and usage scenario. By prioritizing safety, you can fully utilize the features of the InkBird Controller while protecting yourself and your equipment from potential hazards. This ensures a secure and enjoyable cooking experience every time you use the device.

9.2 Understanding the Warranty and Support Options

The InkBird Controller typically comes with a limited warranty covering manufacturing defects for a specified period. Register your device to activate the warranty and access dedicated customer support. For assistance, contact InkBird via email, phone, or their official website. Additional support resources, such as FAQs, user manuals, and video tutorials, are available online to help troubleshoot issues and optimize performance. Warranty claims require proof of purchase and may vary by region and model. Ensure to review the warranty terms for details on coverage and exclusions. InkBird also offers extended support options for enhanced assistance, ensuring your device operates at its best. Utilize these resources to resolve any queries or concerns promptly, ensuring a seamless experience with your InkBird Controller. This comprehensive support system is designed to provide peace of mind and maintain your satisfaction with the product. By understanding your warranty and support options, you can effectively address any issues and maximize the longevity of your InkBird Controller.

crew change guide

Crew change management is a critical process ensuring smooth seafarer rotations, maintaining operational efficiency, and complying with safety and regulatory standards in maritime operations globally.

1.1. Importance of Crew Change in Maritime Operations

Crew changes are essential for ensuring safety, compliance, and operational continuity in maritime operations. They prevent crew fatigue, maintain skill levels, and adhere to health protocols like COVID-19 vaccination requirements. Smooth crew rotations ensure vessels operate efficiently, meet international regulations, and support seafarer well-being. Effective crew changes are vital for sustaining maritime productivity and global trade while minimizing risks associated with overworked crews and non-compliance with legal standards.

1.2. Key Challenges in Modern Crew Management

Modern crew management faces challenges like visa and immigration complexities, medical screening delays, and coordination with port authorities. The pandemic highlighted issues with traditional practices, such as crew fatigue and health risks. Ensuring compliance with international regulations while managing charterer and shipowner responsibilities adds complexity. Logistical challenges, including scheduling and travel arrangements, further complicate the process, requiring proactive planning and clear communication to maintain operational efficiency and seafarer well-being in a highly regulated industry.

Preparing for a Crew Change

Preparing for a crew change involves thorough planning, coordination with port agents, and ensuring compliance with visa, medical, and safety protocols to facilitate smooth transitions.

2.1. Visa and Immigration Compliance

Ensuring visa and immigration compliance is vital for seamless crew changes. Crew members must meet immigration requirements, which vary by country, and secure necessary visas. Proper documentation, including passports and work permits, must be verified. Delays in processing can disrupt rotations, so proactive application and coordination with authorities are essential. Compliance avoids legal issues and ensures smooth crew transitions, maintaining operational continuity and adherence to regulations. Timely verification of documents prevents last-minute issues, ensuring all seafarers can join or leave vessels without hindrance. This step is crucial for maintaining legal and operational integrity in maritime operations.

2.2. Medical Screenings and Health Protocols

Medical screenings and health protocols are essential for ensuring crew fitness and preventing the spread of illnesses. Pre-boarding medical checks, including COVID-19 testing and vaccinations, are critical. Seafarers must meet health standards, with valid medical certificates. Mental health assessments are also important to address stress and fatigue. Adhering to these protocols minimizes risks, ensures compliance with regulations, and promotes a healthy onboard environment. Regular health screenings and robust protocols safeguard both crew and operational continuity, maintaining high safety standards throughout the crew change process.

2.3. Coordination with Port Agents and Authorities

Effective coordination with port agents and authorities is vital for seamless crew changes. This involves exchanging detailed information on crew lists, travel documents, and health certificates. Port agents facilitate logistical arrangements, such as transportation and accommodation, while authorities ensure compliance with local regulations. Clear communication and advance planning prevent delays and ensure all documentation is in order. Strong collaboration minimizes disruptions, allowing crew changes to proceed efficiently while adhering to legal and operational requirements.

Best Practices for Managing Crew Changes

Adopting best practices ensures efficient crew changes, enhancing safety, compliance, and operational performance. Prioritize clear communication, proactive planning, and leveraging technology to streamline processes effectively across maritime operations.

3.1. Proactive Planning and Scheduling

Proactive planning is essential for seamless crew changes. Begin preparations well in advance, including visa applications, flight bookings, and medical screenings. Coordinate with port agents to ensure smooth transitions. Regularly review and update schedules to adapt to changing circumstances. Effective planning minimizes delays and ensures compliance with all legal and health requirements, fostering operational efficiency and crew well-being. Early preparation also helps mitigate risks and ensures uninterrupted vessel operations.

3.2. Clear Communication Strategies

Effective communication is vital for successful crew changes. Maintain transparency with all stakeholders, including seafarers, port agents, and management. Regular updates on schedules, visa status, and health protocols ensure everyone is informed. Encourage open dialogue to address concerns promptly. Utilize digital platforms for real-time updates and documentation sharing. Clear communication fosters trust, reduces misunderstandings, and ensures seamless transitions. It also helps in quickly resolving issues, minimizing delays, and ensuring compliance with regulations. Consistent communication is key to operational efficiency and crew satisfaction.

3.3. Leveraging Technology for Efficient Processes

Technology plays a pivotal role in streamlining crew change processes. Implementing crew management software ensures real-time tracking of seafarer rotations, visa expiry dates, and training records. Automated systems reduce manual errors and enhance data accuracy. Digital platforms facilitate seamless communication between stakeholders, while mobile apps enable seafarers to access schedules and updates instantly. Additionally, technology aids in compliance tracking, ensuring adherence to international maritime regulations. By integrating advanced tools, companies can optimize efficiency, reduce costs, and improve overall crew management outcomes, fostering a more organized and transparent process.

The Crew Change Process

The crew change process involves pre-boarding preparations, onboard familiarization, and post-change reporting, ensuring smooth transitions while maintaining compliance and safety standards throughout.

4.1. Pre-Boarding Procedures

Pre-boarding procedures are essential for ensuring a smooth crew change. These include verifying visa and immigration compliance, conducting medical screenings, and ensuring all necessary vaccinations are up-to-date. Crew members must also complete required documentation and familiarize themselves with safety protocols before boarding. Proper coordination with port agents and travel arrangements, such as flight bookings, must be finalized in advance. Clear communication between shipowners and agents ensures all pre-boarding steps are completed efficiently, minimizing delays and ensuring compliance with health and safety regulations. This preparation is vital for a seamless transition.

4.2. Onboard Familiarization and Handover

Onboard familiarization and handover ensure a seamless transition between outgoing and incoming crew. This process involves detailed briefings on ship operations, safety protocols, and equipment. The handover includes transferring knowledge of current voyages, maintenance status, and safety procedures. Crew members must review all documentation and conduct joint inspections of critical systems. Effective communication and collaboration during this phase are vital for maintaining operational continuity and ensuring safety standards are upheld. This step is crucial for minimizing disruptions and ensuring a smooth takeover of responsibilities.

4.3. Post-Change Reporting and Documentation

Post-change reporting involves documenting the handover process, updating crew lists, and submitting reports to relevant authorities. Accurate records ensure compliance with maritime regulations. Reports are shared with shipowners, agents, and health officials. Proper documentation is crucial for accountability and future reference. It streamlines audits and ensures operational continuity; Thorough post-change documentation supports transparency and efficiency in crew management processes.

Health and Safety Protocols

Health and safety protocols are essential to protect seafarers during crew changes. COVID-19 vaccination, testing, and gold standard hygiene practices ensure a safe working environment onboard ships.

5.1. COVID-19 Vaccination and Testing Requirements

COVID-19 vaccination and testing are critical for ensuring crew safety. Seafarers must meet vaccination requirements and undergo pre-boarding tests to minimize health risks. Many countries prioritize vaccinating seafarers as key workers, reducing transmission chances. Strict health protocols, including masks and distancing, are enforced during crew changes. Regular testing ensures compliance with global health standards, preventing outbreaks onboard. These measures are vital for maintaining operational continuity and safeguarding crew well-being during the pandemic.

5.2. Implementing Gold Standard Health Practices

Gold standard health practices prioritize seafarer well-being through enhanced sanitation, hygiene, and mental health support. Regular health screenings, proper PPE use, and clean living quarters are essential. Mental health initiatives, such as counseling services, reduce stress and improve crew morale. These practices not only prevent illnesses but also foster a safer and more productive work environment, aligning with global health standards and ensuring crew readiness for maritime operations.

Legal and Regulatory Compliance

Adhering to international maritime laws, visa requirements, and labor standards is essential for compliant crew changes, ensuring smooth operations and avoiding legal repercussions globally.

6.1. Adhering to International Maritime Regulations

Compliance with international maritime regulations is vital for seamless crew changes. These regulations ensure seafarers’ rights are protected, safety standards are met, and environmental protocols are followed. Proper documentation, such as valid passports and visas, must be verified. Additionally, adherence to health and safety guidelines, including COVID-19 vaccination requirements, is mandatory. Shipowners and charterers must work together to follow these rules, avoiding legal issues and ensuring smooth operations. Proactive planning helps prevent delays.

6.2. Understanding Charterer and Shipowner Responsibilities

Charterers and shipowners share distinct roles in crew changes. Charterers typically manage port logistics and scheduling, while shipowners oversee crew welfare and compliance. Clear communication and collaboration are essential to ensure smooth operations. Both parties must adhere to legal and safety standards, with charterers coordinating port arrangements and shipowners handling documentation and seafarer well-being. Their collective efforts ensure efficient, safe, and legally compliant crew changes, maintaining operational continuity and avoiding potential disputes or delays.

Case Studies and Success Stories

Real-world examples highlight successful crew change strategies, showcasing reduced delays, enhanced safety, and operational efficiency through proactive planning and clear communication.

7.1. Effective Crew Change Strategies in Practice

Real-world applications demonstrate successful crew change practices, such as advanced planning, streamlined coordination with port agents, and adherence to health protocols. These strategies reduce delays, enhance safety, and ensure compliance with regulations. For instance, proactive visa management and early medical screenings have minimized operational disruptions. Clear communication between stakeholders, including shipowners and charterers, further supports seamless transitions. Such practices underscore the importance of collaboration and preparation in achieving efficient crew rotations while maintaining high standards of safety and regulatory adherence.

7.2. Lessons Learned from Industry Leaders

Industry leaders emphasize prioritizing crew well-being, proactive planning, and clear communication as essential for successful crew changes. They highlight the importance of collaboration between shipowners and charterers to minimize disruptions. Recognizing seafarers as key workers, especially during crises like COVID-19, has proven critical. Investing in continuous training and leveraging technology for efficient processes are also key takeaways. These insights underscore the value of adaptability, transparency, and strategic preparedness in managing crew rotations effectively while ensuring safety and compliance.

Future Trends in Crew Management

Industry leaders highlight the importance of proactive planning, clear communication, and prioritizing crew well-being. They emphasize collaboration between shipowners and charterers to minimize disruptions and ensure smooth transitions. Recognizing seafarers as key workers, especially during crises, has been crucial. Continuous training, leveraging technology, and adaptability are key takeaways for effective crew management. These insights underscore the value of strategic preparedness and transparency in maintaining safety and compliance.

8.1. Digitalization and Automation in Crew Changes

Digitalization and automation are transforming crew change processes, enhancing efficiency and transparency. Advanced software streamlines scheduling, reduces administrative burdens, and ensures compliance with regulations. AI-driven tools optimize crew rotations, while blockchain secures documentation. Automation improves accuracy in visa and medical screenings, reducing delays. Real-time tracking of crew movements and seamless communication platforms further support smooth transitions. These technologies not only modernize operations but also align with sustainability goals, ensuring safer and more efficient maritime practices. They are key to future-proofing crew management systems.

8.2. Sustainability and Crew Well-Being Initiatives

Sustainability and crew well-being are increasingly prioritized in maritime operations. Initiatives focus on reducing environmental impact while enhancing seafarer mental and physical health. Eco-friendly practices, such as energy-efficient vessels, align with global sustainability goals. Crew well-being programs include mental health support, fitness facilities, and improved living conditions. These initiatives not only boost morale and retention but also contribute to a healthier, more sustainable maritime industry, ensuring seafarers thrive in their critical roles. Such efforts are vital for long-term operational success and environmental stewardship.

hyundai elantra service schedule pdf

Regular maintenance is essential for optimal performance and longevity of your Hyundai Elantra. The service schedule outlines necessary checks and replacements to ensure reliability and efficiency.

By following the recommended intervals‚ you can prevent potential issues‚ maintain fuel efficiency‚ and uphold your vehicle’s warranty. This guide helps you stay on track with essential care.

Overview of the Importance of Regular Maintenance

Regular maintenance is crucial for ensuring your Hyundai Elantra performs optimally and maintains its longevity. It helps prevent unexpected breakdowns‚ reduces repair costs‚ and ensures safety on the road. By following the recommended service intervals‚ you can identify and address potential issues early‚ preventing them from becoming major problems. Proper maintenance also preserves fuel efficiency‚ enhances overall performance‚ and maintains the vehicle’s resale value. Neglecting scheduled maintenance can lead to premature wear and tear‚ compromising both reliability and safety. Consistent care ensures your Hyundai Elantra runs smoothly for years to come.

Why Following the Service Schedule is Crucial for Hyundai Elantra Owners

Adhering to the Hyundai Elantra service schedule ensures your vehicle remains in peak condition‚ optimizing performance and fuel efficiency. Regular maintenance prevents costly repairs by identifying issues early‚ thus extending the lifespan of your car. It also maintains your warranty‚ providing peace of mind and financial protection. Proper care enhances safety‚ ensuring all systems function reliably. Neglecting scheduled services can lead to breakdowns‚ compromising both safety and convenience. Staying on track with recommended maintenance ensures your Hyundai Elantra delivers consistent reliability and drives smoothly for years.

Maintenance Intervals for Hyundai Elantra

Regular maintenance every 6 months or 7‚500 miles‚ and annually or 15‚000 miles‚ ensures optimal performance and longevity of your Hyundai Elantra.

Every 6 Months or 7‚500 Miles Service Requirements

Regular maintenance every 6 months or 7‚500 miles is crucial for your Hyundai Elantra’s health. This interval typically includes an oil and filter change‚ tire rotation‚ and a multi-point inspection. During the inspection‚ technicians check essential components like brakes‚ belts‚ and fluids. Ensuring these tasks are performed helps prevent wear and tear‚ maintains fuel efficiency‚ and keeps your vehicle running smoothly. Adhering to this schedule is vital for extending the life of your car and avoiding potential issues down the road. Always consult your owner’s manual or service schedule PDF for detailed requirements. Proper maintenance is key to optimal performance and reliability.

Every 12 Months or 15‚000 Miles Service Requirements

At every 12 months or 15‚000 miles‚ your Hyundai Elantra requires essential maintenance to ensure optimal performance. This service typically includes replacing the engine oil and filter‚ rotating the tires‚ and conducting a multi-point inspection. During the inspection‚ technicians check critical components like belts‚ hoses‚ and the battery to ensure they are in good condition. Additionally‚ the air filter may be replaced to maintain proper airflow and fuel efficiency. This interval is a cornerstone of the maintenance schedule‚ helping to prevent potential issues and keep your vehicle running smoothly and efficiently. Always refer to your owner’s manual or service schedule PDF for specific requirements.

Additional Mileage-Based Maintenance Recommendations

Beyond the standard intervals‚ additional services are recommended at specific mileages to ensure your Hyundai Elantra remains in top condition. At 30‚000 miles‚ replace the cabin air filter and inspect belts for wear. At 60‚000 miles‚ spark plugs should be replaced‚ and the drive belts may need attention. Coolant replacement is typically required at 90‚000 miles‚ while transmission fluid may need servicing around 105‚000 miles. Brake fluid should be replaced every 30‚000 miles. These additional recommendations help maintain performance‚ prevent wear‚ and ensure longevity of your vehicle’s critical systems. Always consult your service schedule PDF for detailed guidance.

Understanding the Service Schedule

The Hyundai Elantra service schedule PDF guides owners through regular maintenance intervals‚ ensuring optimal vehicle performance and longevity. It outlines required services at specific mileages to maintain reliability and efficiency.

How to Read and Interpret the Hyundai Elantra Service Schedule PDF

The Hyundai Elantra service schedule PDF is structured to help owners easily identify required maintenance at specific intervals. It typically includes a table or chart listing mileage checkpoints and corresponding services‚ such as oil changes‚ tire rotations‚ and inspections. Users can navigate the document by referencing sections like “Maintenance Intervals” or “Service Requirements.” Symbols and notes clarify tasks‚ while detailed descriptions guide DIYers or inform those visiting a dealership. Understanding the schedule ensures timely care‚ preventing issues and maintaining performance. Always refer to the PDF for accurate‚ model-specific recommendations tailored to your vehicle’s needs.

Key Components of the Maintenance Schedule

The Hyundai Elantra maintenance schedule includes essential services like oil changes‚ tire rotations‚ and multi-point inspections. It outlines specific intervals‚ such as every 6 months or 7‚500 miles‚ and 12 months or 15‚000 miles. Additional recommendations are provided for higher mileage vehicles‚ ensuring comprehensive care. The schedule also covers fluid checks‚ brake inspections‚ and battery health; By following these components‚ owners can ensure their vehicle runs efficiently‚ maintains safety‚ and avoids costly repairs. Proper adherence to the schedule preserves the car’s value and performance over time.

Fluid Checks and Top-Offs

Regular fluid inspections ensure optimal performance and prevent damage. Check engine oil‚ coolant‚ brake fluid‚ and transmission fluid levels‚ topping them off as needed to maintain proper function.

Importance of Regular Fluid Inspections

Regular fluid inspections are crucial for maintaining your Hyundai Elantra’s performance and longevity. Engine oil‚ coolant‚ brake fluid‚ and transmission fluid play vital roles in lubrication‚ temperature regulation‚ and system operation.

Neglecting fluid checks can lead to overheating‚ reduced braking efficiency‚ or transmission failure. Consistent inspections ensure fluids are at proper levels and free from contamination‚ preventing costly repairs and extending vehicle lifespan.

Which Fluids to Check and Top Off

Regularly inspect and top off essential fluids in your Hyundai Elantra to ensure optimal performance. Engine oil lubricates the engine‚ while coolant prevents overheating. Brake fluid is vital for proper braking‚ and transmission fluid ensures smooth gear shifts. Additionally‚ check the windshield washer fluid for visibility and battery fluid levels for electrical system health.

Refer to your service schedule for specific intervals‚ typically every 6 months or 7‚500 miles. Proper fluid maintenance prevents breakdowns‚ enhances efficiency‚ and extends your vehicle’s lifespan.

Tire Care and Maintenance

Proper tire care ensures safety‚ handling‚ and fuel efficiency. Regular rotation and pressure checks are crucial for even tread wear and optimal performance.

Proper Tire Rotation Patterns for Hyundai Elantra

Regular tire rotation ensures even tread wear and extends tire life. For Hyundai Elantra‚ the recommended pattern is a rearward cross‚ moving front tires to the rear on the opposite side. This method‚ outlined in the owner’s manual‚ should be performed every 6 months or 7‚500 miles. Proper rotation improves handling‚ traction‚ and overall safety. Always refer to the service schedule for specific guidelines tailored to your vehicle’s drivetrain‚ whether front-wheel or all-wheel drive‚ to maintain optimal performance and prevent uneven wear.

Recommended Tire Pressure Levels

For optimal performance and safety‚ Hyundai Elantra tire pressure should be set to the manufacturer-recommended levels‚ typically 30-35 PSI for front and rear tires. Ensure to check the owner’s manual or the tire information placard on the driver’s side doorjamb for specific guidance. Proper inflation enhances fuel efficiency‚ handling‚ and safety. Check tire pressure when tires are cold for an accurate reading. Adhering to these levels helps extend tire life and ensures a smooth driving experience.

Brake System Maintenance

Regular brake inspections are crucial for safety and performance. Ensure brake pads are checked and replaced as needed‚ and brake fluid levels and condition are monitored.

When to Inspect and Replace Brake Pads

Inspect brake pads every 12‚000 miles or as indicated by your Hyundai Elantra service schedule. Look for signs of wear‚ such as thinning pads or squeaking noises. Replace pads when worn below 1/8 inch. Proper maintenance ensures safety and prevents rotor damage. Always refer to the service schedule PDF for precise guidelines and consult a certified Hyundai technician for professional inspection and replacement. Regular checks help maintain braking performance and avoid costly repairs. Stay proactive to ensure your vehicle remains safe and reliable on the road.

Brake Fluid Level and Condition Checks

Check the brake fluid level every 6 months or 7‚500 miles‚ as per the Hyundai Elantra service schedule. Ensure the fluid reservoir is between the minimum and maximum marks. Inspect for signs of contamination‚ such as dark color or particles. If the level is low‚ inspect for leaks. Replace brake fluid every 30‚000 miles or as recommended. Proper brake fluid condition ensures reliable braking performance and prevents system damage. Always refer to the service schedule PDF for detailed instructions and consult a certified technician if issues arise. Regular checks help maintain safety and prevent costly repairs.

Battery Maintenance

Regular battery checks are crucial for reliable starting and electrical system performance. Inspect for corrosion‚ cracks‚ or wear. Test battery health every 3 years or as needed.

How to Check Battery Health

Start by visually inspecting the battery for signs of damage‚ corrosion‚ or wear. Clean the terminals if necessary using a wire brush and baking soda solution.

Use a multimeter to measure voltage with the engine off (should be around 12.4-12.7V). Turn on headlights for 10 minutes‚ then measure voltage again (should be above 10V).

If voltage drops below 10V‚ the battery may need recharging or replacement. Hyundai recommends testing battery health every 3 years or as indicated by the owner’s manual.

When to Replace the Battery

Replace the battery if it shows signs of weakness‚ such as slow engine crank‚ dim headlights‚ or difficulty starting the car. Age is a key factor—most batteries last 3-5 years.

If your Hyundai Elantra is 5 years or older‚ consider a professional test. Corrosion‚ swelling‚ or a voltage drop below 10V indicates the need for a new battery.

Always refer to the owner’s manual or consult a Hyundai-certified technician for precise replacement intervals and recommendations tailored to your vehicle’s condition.

Spark Plugs and Air Filters

Regular spark plug replacements ensure optimal combustion‚ while clean air filters improve fuel efficiency. Both should be maintained as per the recommended service intervals.

Recommended Spark Plug Replacement Intervals

Spark plugs in your Hyundai Elantra should be replaced every 105‚000 miles or as specified in your owner’s manual. Proper replacement ensures optimal engine performance and fuel efficiency. Neglecting this can lead to degraded combustion‚ misfires‚ and reduced power. Always use genuine Hyundai spark plugs for reliability. Regular inspections during routine maintenance can help identify worn-out plugs early. Follow the schedule to maintain your vehicle’s health and avoid costly repairs. This interval applies to most Elantra models‚ but verify specifics for your model year in the service schedule PDF.

Importance of Air Filter Cleaning and Replacement

Regular air filter cleaning and replacement are vital for maintaining your Hyundai Elantra’s performance and fuel efficiency. A dirty air filter can restrict airflow‚ reducing engine power and increasing fuel consumption. It is recommended to inspect and replace the air filter every 15‚000 to 30‚000 miles‚ depending on driving conditions. Dusty or polluted environments may require more frequent changes. A clean air filter ensures proper combustion‚ better mileage‚ and reduced emissions. Neglecting this can lead to decreased performance and potential damage to the engine. Always refer to your service schedule PDF for precise guidelines tailored to your vehicle.

Adhering to the Hyundai Elantra service schedule ensures optimal performance‚ longevity‚ and safety. Regular maintenance helps prevent issues‚ enhances fuel efficiency‚ and maintains your vehicle’s value. By following the recommended intervals for oil changes‚ tire rotations‚ and inspections‚ you can avoid costly repairs. Stay proactive with fluid checks‚ battery care‚ and air filter replacements to keep your Elantra running smoothly. Always consult your service schedule PDF for detailed guidelines tailored to your vehicle’s needs. Proper maintenance is the key to a trouble-free driving experience.

Final Tips for Keeping Your Hyundai Elantra in Optimal Condition

Regularly review your Hyundai Elantra service schedule PDF to stay informed about necessary maintenance. Always address minor issues promptly to prevent them from becoming major problems. Keep your vehicle clean‚ as dirt and debris can affect performance. Refer to your owner’s manual for guidance on fluid levels‚ tire pressure‚ and battery care. Avoid extreme temperatures and ensure proper ventilation to maintain interior health. By combining these practices with routine servicing‚ you’ll enjoy a smooth‚ efficient‚ and longevity-enhanced driving experience.

kings fridge f1 f2 f3 troubleshooting pdf

The Kings Fridge F1, F2, and F3 models are renowned for their innovative cooling solutions. This guide provides detailed troubleshooting steps for common issues, ensuring optimal performance and addressing error codes effectively for users.

Overview of the Kings Fridge F1, F2, F3 Models

The Kings Fridge F1, F2, and F3 models are advanced refrigeration solutions designed for reliability and performance. These models are part of the Adventure Kings 15L fridge/freezer series, known for their portability and efficiency; The F1 model is equipped with external battery protection, while the F2 features fan overload protection. The F3, on the other hand, includes compressor frequent start protection. These units are designed to operate on DC voltage inputs, making them ideal for outdoor and off-grid use. They also come with adjustable voltage cut-off settings, allowing users to customize battery protection levels. With innovative cooling technology and robust safety features, the F1, F2, and F3 models are popular choices for both home and adventure use, ensuring reliable refrigeration in various environments.

F1 Error Code Troubleshooting

The F1 error indicates external battery protection issues. Check the power cord for damage and ensure proper connections. Adjust battery protection settings to resolve the issue effectively.

Understanding the F1 Error: External Battery Protection

The F1 error on Kings Fridges signifies issues with external battery protection. It occurs when the system detects unstable or insufficient voltage, preventing damage to the appliance. This feature ensures the fridge doesn’t operate with unsafe power levels, protecting both the battery and the unit. Common triggers include low battery voltage or faulty connections. Recognizing this error is crucial for maintaining your appliance’s longevity and performance. Always refer to the troubleshooting guide for detailed solutions to resolve this issue promptly and safely.

Steps to Resolve the F1 Error Code

To address the F1 error, start by checking the battery voltage. If it’s low, charge the battery or ensure a stable power supply. Inspect the connections for any damage or corrosion and clean them if necessary. Adjust the battery protection settings by pressing and holding the settings button, switching from High (H) to Medium (M) or Low (L). If the voltage exceeds 12.4V but the F1 error persists, consider replacing the battery. Resetting the fridge by disconnecting it from power for 15 minutes may also resolve the issue. Always refer to the user manual for specific adjustment ranges and procedures to ensure proper functioning and prevent further errors.

F2 Error Code Troubleshooting

The F2 error indicates fan overload protection. Switch off the fridge for 30 minutes to allow cooling. Check for fan blockages or obstructions and ensure proper airflow.

What the F2 Error Indicates: Fan Overload Protection

The F2 error code on your Kings Fridge signifies that the appliance has entered fan overload protection mode. This occurs when the internal fan, responsible for cooling the compressor and condenser coils, detects an abnormal increase in temperature or resistance. Such conditions can arise from obstructed airflow, excessive ambient heat, or a malfunctioning fan motor. It is crucial to address this issue promptly to prevent potential damage to the compressor and ensure efficient operation. Resolving the F2 error involves checking for blockages, ensuring proper ventilation, and allowing the system to cool down. Regular maintenance, such as cleaning the fan and verifying adequate spacing around the fridge, can help prevent this error from recurring.

Solutions for the F2 Error Code

To resolve the F2 error code, start by switching off the fridge and allowing it to cool down for 30 minutes. This will help the internal components return to a safe operating temperature. Next, inspect the fan for any blockages or debris and clean it if necessary. Ensure proper ventilation around the appliance by checking for obstructions or tight spacing. If the fan is damaged, consider replacing it. Additionally, verify that the ambient temperature in the room is within the recommended range for the fridge’s operation. After addressing these potential issues, restart the fridge and monitor its performance. If the F2 error persists, consult a professional technician to diagnose and repair any underlying problems. Regular maintenance can help prevent future occurrences of this error.

F3 Error Code Troubleshooting

Identifying the F3 Error: Compressor Frequent Start Protection

The F3 error indicates the compressor is starting too frequently. Check your battery protection settings, ensure a stable power supply, and adjust settings as necessary for optimal performance.

The F3 error code on your Kings Fridge indicates that the compressor is starting too frequently, potentially due to high ambient temperatures or low battery voltage. This protection mode activates to prevent overheating or excessive wear on the compressor. To identify the issue, check if the fridge is in a hot environment or if the battery voltage is unstable. Ensure the fridge is placed in a well-ventilated, cooler area and verify that the power source is stable. If the problem persists, consult the user manual for specific guidance on adjusting settings or resetting the system. This error is crucial to address promptly to maintain the longevity and efficiency of your Kings Fridge.

How to Fix the F3 Error Code

To resolve the F3 error code, which indicates compressor frequent start protection, start by ensuring your Kings Fridge is in a cool, well-ventilated area to prevent overheating. Check the battery voltage and ensure it’s stable, as fluctuations can trigger this error. Adjust the battery protection settings from high to medium or low if necessary. Verify that the fridge is level and on a stable surface. If the issue persists, unplug the fridge for 30 minutes to allow the system to reset. After restarting, monitor the error code. If it reappears, consult the user manual or contact customer support for further assistance. Addressing this promptly will help maintain your fridge’s efficiency and longevity.

General Troubleshooting Tips for Kings Fridge

Regularly check power sources, ensure stable voltage, and maintain optimal ambient temperatures. Resetting the fridge by disconnecting power for 30 minutes often resolves minor issues. Adjust settings as needed for proper functionality.

Resetting the Fridge and Adjusting Settings

Resetting your Kings Fridge is a simple process that can resolve many issues. Start by disconnecting the appliance from all power sources for at least 30 minutes. This allows the system to reset and clear any temporary glitches. Once powered back on, check the error codes to ensure they have been cleared. Adjusting settings, such as battery protection levels, can also help prevent recurring errors. For instance, switching from high to medium or low voltage protection may stabilize the fridge’s operation. Refer to the user manual for specific instructions on accessing and modifying these settings. Regular resets and adjustments can maintain optimal performance and extend the lifespan of your appliance.

Checking Power Sources and Ambient Temperature

Ensuring stable power and optimal temperature is crucial for your Kings Fridge. Begin by verifying that the power cord is securely connected and that the outlet is functioning properly. If using a battery, check its voltage to ensure it meets the fridge’s requirements. Next, assess the ambient temperature, as high temperatures can strain the compressor and trigger errors like F3. Move the fridge to a cooler, well-ventilated area if necessary. Avoid exposing it to direct sunlight or moisture. If the issue persists, consult the user manual for voltage settings and adjust accordingly. Maintaining a stable environment and power supply helps prevent errors and ensures efficient operation of your Kings Fridge.

rankpay complete guide to quora marketing

Quora marketing is a powerful tool for businesses to enhance brand awareness‚ generate leads‚ and establish authority‚ with RankPay’s guide helping you unlock its full potential․

Why Quora is Essential for Your Marketing Strategy

Quora is an indispensable platform for marketers‚ offering unparalleled access to a vast‚ engaged audience seeking trusted insights․ With over 300 million monthly visitors‚ it provides a unique opportunity to position your brand as an authority in your niche․ By answering relevant questions‚ you can drive high-intent traffic‚ generate leads‚ and build credibility․ Quora’s evergreen content further enhances its value‚ as answers remain visible long after posting․ This platform aligns perfectly with SEO and content marketing strategies‚ making it a vital tool for businesses aiming to elevate their online presence and connect with their target audience effectively․

Understanding Quora’s Marketing Landscape

Quora’s vast‚ engaged audience and knowledge-sharing platform create unique opportunities for brand awareness and lead generation‚ making it a goldmine for businesses seeking targeted reach and thought leadership․

The Unique Opportunities of Quora for Brand Awareness and Lead Generation

Quora’s vast audience of over 300 million monthly users presents a unique chance to position your brand as an industry leader․ By answering relevant questions‚ businesses can showcase expertise‚ build trust‚ and attract high-intent users․ Unlike traditional ads‚ Quora allows for organic engagement‚ fostering meaningful connections․ Its SEO-friendly platform also boosts search engine rankings‚ driving sustained traffic․ With targeted Quora Ads‚ businesses can reach niche audiences‚ enhancing lead generation and conversion rates․ This blend of organic and paid strategies makes Quora a potent tool for both brand visibility and customer acquisition․

Setting Up Your Quora Profile for Success

Crafting a professional Quora profile involves a clear bio‚ high-quality profile picture‚ and showcasing expertise to establish credibility and engage your target audience effectively․

Optimizing Your Profile to Establish Authority and Credibility

Optimizing your Quora profile is crucial for building trust and authority․ Start with a professional profile picture and a compelling bio that highlights your expertise and experience․ Include relevant keywords to improve visibility․ Link your website or blog to drive traffic and showcase your work․ Consistency is key—ensure your profile aligns with your brand․ Regularly update your credentials and achievements to demonstrate credibility․ A well-optimized profile attracts followers‚ increases engagement‚ and positions you as a thought leader in your industry․ This foundation is essential for successful Quora marketing efforts․

Crafting High-Quality Content on Quora

Crafting high-quality content on Quora involves writing engaging‚ informative answers that provide value to users․ Focus on addressing their needs‚ offering unique insights‚ and linking to relevant resources to drive traffic and sales․

How to Write Engaging Answers That Drive Traffic and Sales

To craft engaging Quora answers‚ focus on addressing the user’s needs with clarity and depth․ Personalize your responses to build trust and use a conversational tone to connect․ Highlight key points and include actionable tips or examples to add value․ Avoid overt self-promotion and instead subtly link to relevant resources or your website․ Optimize your answers with SEO-friendly keywords to improve visibility․ Consistency and patience are key‚ as building authority takes time․ By providing genuine value‚ you can drive organic traffic and generate sales effectively․

Leveraging Quora Ads for Targeted Reach

Quora Ads offer a precise way to target users actively seeking information‚ making them highly effective for driving conversions and brand visibility‚ as detailed in RankPay’s guide․

A Step-by-Step Guide to Running Effective Quora Advertising Campaigns

Running successful Quora Ads campaigns begins with identifying your target audience and selecting relevant topics․ Start by creating engaging ad content that addresses users’ specific needs․ Use Quora’s robust targeting options‚ including keywords and question targeting‚ to ensure your ads reach the right people․ Set a budget and bid strategically to maximize ROI․ Continuously monitor performance metrics to optimize campaigns and refine your approach․ RankPay’s guide provides actionable insights to help you execute these steps effectively‚ ensuring your Quora Ads drive meaningful results for your business․

Integrating SEO with Quora Marketing

Quora’s SEO-friendly platform helps improve search engine rankings․ By sharing expert insights‚ you drive organic traffic and enhance visibility‚ aligning with RankPay’s strategies for SEO success․

How to Use Quora to Boost Your Search Engine Rankings

Quora offers a unique opportunity to enhance your SEO strategy․ By answering relevant questions with expert insights‚ you can drive organic traffic to your website․ Sharing high-quality content on Quora helps improve your search engine rankings‚ as its platform is inherently SEO-friendly․ Additionally‚ linking back to your site in answers provides valuable backlinks‚ boosting your domain authority․ RankPay’s guide emphasizes leveraging Quora’s vast audience to increase visibility and credibility‚ making it a powerful tool for improving your website’s performance on search engines․

Case Studies: Successful Quora Marketing Campaigns

Explore real-world examples of businesses that harnessed Quora to achieve remarkable results‚ generating leads and building brand awareness through strategic engagement and high-quality content․

Analyzing Campaigns That Achieved Remarkable Results

Successful Quora marketing campaigns demonstrate how strategic engagement can drive significant outcomes․ Brands like RankPay leveraged high-intent questions to deliver value‚ boosting traffic and conversions․ By focusing on niche topics‚ they established authority‚ attracting over 500k views․ Detailed answers with actionable insights resonated deeply‚ fostering trust and credibility․ These campaigns highlight the importance of aligning content with audience needs‚ showcasing products naturally within answers․ Tools like SEO integration and Quora Ads amplified reach‚ ensuring targeted visibility․ These case studies reveal actionable strategies for replicating success‚ proving Quora’s potential for lead generation and brand growth․

Tools and Resources for Quora Marketing

Essential tools like SEO optimizers‚ analytics trackers‚ and content schedulers streamline your Quora strategy‚ enhancing productivity and performance while ensuring consistent engagement and measurable results․

Essential Tools to Streamline and Enhance Your Quora Strategy

Utilizing the right tools is crucial for optimizing your Quora marketing efforts․ RankPay recommends leveraging SEO tools to identify high-traffic questions‚ analytics platforms to track engagement‚ and content schedulers to maintain consistency․ Additionally‚ browser extensions can help streamline profile management and answer curation․ These resources not only save time but also ensure your strategy remains aligned with your business goals‚ maximizing your reach and impact on the platform․

Best Practices for Long-Term Success

Consistency‚ genuine engagement‚ and providing value are key to long-term success․ Avoid hard selling and focus on building trust to maximize your ROI in Quora marketing․

Avoiding Common Mistakes and Maximizing Your ROI

Avoiding Common Mistakes and Maximizing Your ROI

To maximize ROI‚ avoid aggressive self-promotion and focus on delivering value․ Ensure your answers are insightful and relevant‚ building trust with your audience․ Overly promotional content can lead to downvotes and reduced visibility․ Instead‚ adopt a strategic approach by answering questions in your niche‚ optimizing your profile‚ and leveraging SEO techniques․ Consistency is key; regular engagement helps maintain a strong presence․ Additionally‚ track metrics to refine your strategy and avoid common pitfalls like low-quality content or irregular activity․ By aligning your efforts with Quora’s guidelines‚ you can foster meaningful connections and achieve sustainable growth․

The Future of Quora Marketing

Quora’s evolving platform‚ with its growing user base and knowledge-sharing focus‚ presents expanding opportunities for brands to leverage advanced advertising and AI-driven insights for future marketing success․

Trends and Innovations to Watch in 2025 and Beyond

As Quora continues to evolve‚ expect advancements in AI-driven content recommendations and enhanced targeting capabilities for advertisers․ Video content integration and interactive Q&A formats will rise‚ offering brands new ways to engage audiences․ Personalized user experiences and predictive analytics will further refine marketing strategies․ The platform’s focus on knowledge-sharing will deepen‚ making it a hub for thought leadership and niche expertise․ With tools like RankPay‚ marketers can optimize campaigns‚ leveraging these trends to maximize ROI and stay ahead in the competitive digital landscape․

pattern for leather 8.5 x 14 notebook pdf free download

Leather notebook covers are a timeless choice for protecting your 8.5 x 14 notebook while adding style and durability. Crafted from high-quality materials, they offer a sophisticated look and feel, making them perfect for everyday use or as a personalized gift. With free downloadable PDF patterns available, DIY enthusiasts can create custom covers tailored to their preferences, ensuring a perfect fit and unique design. This project combines functionality with creativity, allowing you to safeguard your notebook in a sleek, professional manner.

Overview of the Popularity of Leather Notebook Covers

Leather notebook covers are increasingly popular due to their timeless appeal, durability, and elegant aesthetic. They offer superior protection for notebooks while adding a touch of sophistication. The availability of free PDF patterns for sizes like 8.5 x 14 has further boosted their popularity, allowing DIY enthusiasts to craft custom covers. Leather’s natural texture and ability to develop a beautiful patina over time make these covers a favorite among professionals and creatives alike.

Benefits of DIY Leather Notebook Covers

Creating a DIY leather notebook cover offers numerous benefits, including customization, cost-effectiveness, and a sense of accomplishment. With free PDF patterns for 8.5 x 14 notebooks, you can tailor the cover to your style and needs. This project allows you to choose the leather type, color, and design, ensuring a unique and personalized accessory. Additionally, DIY covers are often more durable and long-lasting compared to store-bought options, providing excellent protection for your notebook while showcasing your craftsmanship.

Understanding the 8.5 x 14 Notebook Size

The 8.5 x 14 notebook size is a popular choice due to its versatility, offering ample space for writing and sketching while remaining portable. Its larger dimensions make it ideal for detailed work, organization, and creativity, catering to both personal and professional use. This size is widely available, making it easy to find or create custom patterns for leather covers.

Why 8.5 x 14 is a Popular Choice for Notebooks

The 8.5 x 14 notebook size is widely favored for its versatility and practicality. It offers ample space for writing, sketching, and organizing content while remaining portable. This size strikes a perfect balance between convenience and usability, making it ideal for both personal and professional purposes. Its larger dimensions accommodate detailed work without being cumbersome, and its popularity ensures a wide range of compatible accessories, including custom leather covers, are readily available.

Measuring and Adapting Patterns for This Size

Accurate measurements are crucial when working with an 8.5 x 14 notebook. Start by measuring the notebook’s height, width, and spine thickness to ensure a precise fit. Add a small margin around the edges for proper coverage and flexibility. Use a ruler or calipers for precision, and consider the leather’s thickness when adapting the pattern. Testing the pattern on paper first can help identify adjustments needed before cutting the leather. This ensures a seamless fit and professional finish.

Materials and Tools Needed

Essential materials include high-quality full-grain leather, sturdy thread, and adhesive. Tools like sharp cutters, a ruler, and a hole punch are necessary for precise crafting.

Essential Leatherworking Tools for the Project

Crafting a leather notebook cover requires specific tools for precision and quality. A sharp utility knife or leather cutter is essential for clean cuts. A metal ruler ensures straight edges, while a pencil marks precise measurements. Heavy-duty scissors are useful for smaller details. A sturdy hole punch aids in creating professional-looking holes for stitching. Optional tools include a leather stamp for personalization and a mallet for shaping. These tools, available at craft stores or online, ensure a polished finish.

Recommended Leather Types for Notebook Covers

Full-grain leather is a top choice for notebook covers due to its durability and natural texture. Goat leather offers a soft yet sturdy option, while Cordoba leather provides a distinctive, textured finish. These leathers are resistant to wear and tear, ensuring long-lasting protection for your notebook. Their rich appearance enhances the cover’s aesthetic appeal, making them ideal for both practical and stylish notebook covers. Choose high-quality leather for a professional and timeless look.

How to Find the Right Leather Pattern

To find the perfect leather pattern for your 8.5 x 14 notebook, visit websites like Makesupply or CestAntiQ, which offer free downloadable PDF templates. These sites provide a variety of designs and sizes, ensuring a precise fit for your notebook. You can also explore leathercraft communities or workshops for additional resources and inspiration to create a custom cover.

Free PDF Patterns for 8.5 x 14 Notebooks

Finding free PDF patterns for an 8.5 x 14 notebook is straightforward, with resources like Makesupply and CestAntiQ offering downloadable templates. These patterns are specifically designed for leather notebook covers, ensuring a perfect fit. They often include measurements, cutting guides, and assembly instructions. Many patterns are available in both Letter and A4 sizes, catering to different preferences. Additionally, some templates offer options for square or rounded corners, allowing for customization. These free resources make it easy to create a professional-looking cover for your notebook.

Where to Download Reliable and Free Templates

Reliable free templates for a leather 8.5 x 14 notebook cover can be found on platforms like Etsy, YouTube, and crafting blogs. Many creators offer PDF patterns in video descriptions or blog posts. Websites like Makesupply and CestAntiQ provide downloadable designs, often in Letter or A4 sizes with options for square or rounded corners. Joining crafting communities or forums can also lead to discovering shared patterns. Additionally, some sites offer free templates as part of promotions or community support, making it easier to find the perfect design for your project.

Downloading and Printing the Pattern

Downloading the pattern as a PDF ensures compatibility with large-format printers or local printing services; Print on Letter or A4 paper for accurate sizing.

Step-by-Step Guide to Printing the PDF Template

Open the PDF file using a compatible viewer like Adobe Acrobat.
Ensure the print settings match your paper size (Letter or A4).
Select “Actual Size” to maintain the correct dimensions.
Print on high-quality paper for clarity.
For large formats, visit a local print shop or use a wide-format printer.
Double-check measurements before cutting to ensure accuracy.
This process guarantees your template is precise and ready for crafting your leather cover.

Tips for Adjusting the Pattern to Your Needs

To customize your leather notebook cover, start by measuring your notebook accurately. Adjust the template by scaling or resizing in the PDF editor. Consider adding extra seam allowances for a snug fit. For a unique look, incorporate rounded corners or additional pockets. Experiment with different leather types, such as goat leather or Cordoba, for varied textures. Personalize further by adding monograms or decorative stitching. Use online resources like CestAntiQ for inspiration and templates.

Cutting and Preparing the Leather

Select high-quality leather and use a craft knife or leather cutter for precise cuts. Ensure smooth edges and a polished finish before assembly.

Best Practices for Cutting Leather Accurately

Use sharp tools like a craft knife or leather cutter to prevent tears; Measure twice and cut once, ensuring accuracy. Place leather on a stable surface, using a ruler or cutting mat for straight edges. Cut along the grain to maintain strength and avoid warping. Apply light pressure to avoid stretching the material. Use patterns or stencils for consistency, especially for intricate designs. Buff edges with a leather edge beveler for a polished finish and apply a leather finisher to protect the cuts.

Preparing the Leather for Assembly

Begin by cleaning the leather with a soft cloth to remove dirt and excess oils. Use a leather conditioner to keep the material supple and prevent cracking. Apply a leather edge beveler to smooth rough edges for a professional finish. Lightly buff the surface with a leather finisher to enhance durability and appearance. Allow the leather to dry completely before proceeding to ensure proper adhesion during assembly. This step ensures your cover is both functional and visually appealing.

Assembling the Leather Cover

Align the cut leather pieces precisely, ensuring all edges match; Secure with temporary fasteners before stitching. Apply adhesive to bind parts, then allow to dry completely for durability.

A Step-by-Step Guide to Constructing the Cover

Begin by aligning the pre-cut leather pieces according to the pattern. Use temporary fasteners to hold them in place. Apply a thin layer of leather adhesive to the edges and let it dry slightly. Carefully stitch along the seams, ensuring tight, even sutures for durability. Fold the cover over the notebook to shape it, then allow the adhesive to fully cure. This method ensures a sturdy, professional-looking cover that protects your notebook effectively.

Techniques for a Professional Finish

To achieve a professional finish, start by edge beveling the leather for smooth edges. Use a leather burnishing tool or a riveter to create crisp folds and secure seams. Apply a light coat of leather wax or conditioner to enhance the texture and protect the material. For a polished look, consider adding a protective coating or subtle embossing. These techniques ensure durability and a sleek, professional appearance for your custom leather notebook cover.

Adding a Personal Touch

Personalize your leather cover with monograms, decorative stitching, or custom colors to reflect your unique style and make it truly special.

Customization Ideas for Your Leather Cover

Add a personal touch to your 8.5 x 14 notebook cover with custom embroidery, unique stitching patterns, or hand-tooled designs. Use contrasting threads or dyes to make your cover stand out. Incorporate a monogram or meaningful symbol for a personalized look. Experiment with different leather finishes or textures to create a one-of-a-kind design that reflects your style. These details ensure your cover is both functional and visually appealing.

Optional Embellishments and Designs

Elevate your leather notebook cover with optional embellishments like metal rivets, decorative buckles, or intricate stitching. Consider adding a magnetic closure for extra security or a built-in elastic pen holder for convenience. Laser-engraved patterns or debossed designs can also enhance the cover’s aesthetic appeal. These embellishments not only add functionality but also give your notebook a polished, professional finish, making it truly unique and personalized to your taste.

With patience and creativity, you’ve successfully crafted a durable, stylish leather notebook cover. Share your finished project with pride, knowing it combines functionality and personal style perfectly.

Final Tips for a Successful Project

Ensure accurate measurements and precise cutting for a professional finish. Use high-quality leather and tools to maintain durability. Consider adding personal touches like monograms or decorative stitching. Follow patterns carefully, and don’t hesitate to adjust templates for a perfect fit. Practice on scrap leather before working on your final piece. Take your time during assembly to avoid mistakes. Sharing your creation online can inspire others and showcase your craftsmanship. Be patient and enjoy the process of creating something truly unique and functional.

Sharing Your Finished Leather Notebook Cover

Once your leather notebook cover is complete, consider sharing your creation online. Platforms like Instagram, YouTube, and crafting forums are great for showcasing your work. Use hashtags like #LeatherCraft or #DIYNotebookCover to connect with fellow enthusiasts. Sharing tutorials or time-lapse videos of your process can inspire others and build your reputation as a skilled craftsperson. Don’t forget to highlight any unique personal touches or customization. Being part of a community can also provide valuable feedback and motivation for future projects. Sharing your finished cover not only celebrates your achievement but also helps others learn and grow in their own leatherworking journeys.

dr guida

Biography of Dr. Robert A. Guida

Dr. Robert A. Guida, a double board-certified facial plastic surgeon in NYC, has over 30 years of experience specializing in rhinoplasty and revision rhinoplasty. He is affiliated with NewYork-Presbyterian and Weill Cornell Medicine, recognized for his expertise in both functional and cosmetic procedures. His work has earned him distinctions in Castle Connolly’s Best Doctors and New York Magazine’s top Beauty Doctors, solidifying his reputation as a leader in facial surgery.

1.1 Early Life and Education

Dr. Robert A. Guida’s academic journey began with his graduation from MCP Hahnemann School of Medicine, where he earned his medical degree. He then pursued specialized training in otolaryngology and facial plastic surgery, working alongside prominent surgeons in the field. This foundational education and hands-on experience laid the groundwork for his expertise in facial plastic and reconstructive surgery. His early dedication to mastering both the technical and artistic aspects of surgery has been instrumental in his career trajectory.

1.2 Career Milestones

Dr. Robert A. Guida’s career is marked by significant milestones that underscore his dedication and expertise in facial plastic surgery. As a double board-certified otolaryngologist and facial plastic surgeon, he has established himself as a leading authority in rhinoplasty and revision rhinoplasty. His affiliation with NewYork-Presbyterian and Weill Cornell Medicine highlights his commitment to excellence in both patient care and academic contributions. With over three decades of experience, Dr. Guida has consistently demonstrated a unique blend of technical precision and artistic finesse, earning him recognition in esteemed publications such as Castle Connolly’s Best Doctors and New York Magazine’s top Beauty Doctors. Beyond his clinical practice, his humanitarian efforts in treating individuals with congenital deformities further exemplify his profound impact on the field of facial surgery, solidifying his reputation as a compassionate and skilled surgeon.

Medical Expertise

Dr. Robert A. Guida specializes in facial plastic and reconstructive surgery, excelling in rhinoplasty, revision rhinoplasty, sinus surgery, facelifts, and eyelid surgery, combining technical skill with artistic precision.

2.1 Facial Plastic and Reconstructive Surgery

Dr. Robert A. Guida is a distinguished facial plastic and reconstructive surgeon with over three decades of experience. His expertise spans a wide range of procedures, including rhinoplasty, revision rhinoplasty, sinus surgery, and facial reconstruction. Dr. Guida’s approach combines meticulous surgical technique with an artistic eye, ensuring both functional and aesthetic outcomes. He is particularly known for his ability to correct complex nasal deformities and restore facial harmony. His work in reconstructive surgery has helped numerous patients regain confidence and improve their quality of life. With a deep understanding of facial anatomy and a commitment to precision, Dr. Guida continues to set high standards in his field.

2.2 Rhinoplasty and Revision Rhinoplasty

Dr. Robert A. Guida is a leading expert in rhinoplasty and revision rhinoplasty, with over 30 years of experience in refining nasal aesthetics and functionality. His surgical precision and artistic flair enable him to address even the most complex cases, ensuring natural-looking results. Dr. Guida specializes in correcting previous surgeries, improving breathing issues, and enhancing facial symmetry. His meticulous approach to rhinoplasty has earned him a reputation for delivering exceptional outcomes, blending functional improvement with cosmetic appeal. Patients often praise his ability to restore confidence through tailored solutions, making him one of New York’s most trusted surgeons for nose surgery and revision procedures.

Surgical Specializations

Dr. Robert A. Guida, a double board-certified surgeon, excels in facial plastic and reconstructive surgery, rhinoplasty, facelifts, and eyelid surgery, ensuring natural, rejuvenated results for his patients.

3.1 Functional and Cosmetic Nose Surgery

Dr. Robert A. Guida specializes in both functional and cosmetic nose surgery, offering tailored solutions for patients seeking improved breathing or aesthetic refinement. With over three decades of experience, he combines technical precision with artistic vision to deliver natural, personalized results. His expertise extends to rhinoplasty, revision rhinoplasty, and sinus surgery, ensuring comprehensive care for both form and function. Patients praise his meticulous approach and dedication to achieving their desired outcomes, making him a trusted name in facial surgery.

3.2 Facelift and Eyelid Surgery

Dr. Robert A. Guida excels in facial rejuvenation through advanced facelift and eyelid surgery techniques. His delicate touch and artistic precision help patients achieve a youthful, refreshed appearance. With over three decades of experience, he tailors procedures to address individual concerns, ensuring natural-looking results. Dr. Guida’s expertise extends to both surgical and non-surgical approaches, offering solutions for sagging skin, wrinkles, and under-eye concerns. Patients praise his ability to restore vitality while maintaining a natural aesthetic, making him a trusted name in facial surgery for those seeking to rejuvenate their appearance with minimal downtime and maximum satisfaction.

Professional Affiliations

Dr. Robert A. Guida is affiliated with NewYork-Presbyterian and Weill Cornell Medicine, where he serves as a voluntary faculty member, contributing to its mission of excellence in medical education and care.

4.1 NewYork-Presbyterian and Weill Cornell Medicine

Dr. Robert A. Guida is a distinguished member of the medical community at NewYork-Presbyterian and Weill Cornell Medicine. As an Associate Professor of Surgery and Associate Attending Surgeon, he contributes significantly to medical education and patient care. His affiliation with these prestigious institutions underscores his commitment to excellence in facial plastic and reconstructive surgery. Dr. Guida’s work at Weill Cornell Medicine emphasizes innovative approaches to rhinoplasty, revision rhinoplasty, and sinus surgery. His dedication to teaching and clinical practice has earned him recognition as one of Castle Connolly’s Best Doctors. Through his affiliation, Dr. Guida continues to advance the field of facial surgery while providing exceptional care to his patients.

Patient Reviews and Testimonials

Dr. Robert A. Guida is praised by patients for his exceptional skill, professionalism, and dedication. Many highlight his ability to deliver natural-looking results and express gratitude for life-changing outcomes.

5.1 Patient Satisfaction and Success Stories

Patients consistently praise Dr. Robert A. Guida for his exceptional surgical skill and dedication to achieving natural, life-changing results. Many share heartfelt testimonials, highlighting their satisfaction with procedures like rhinoplasty and facelifts. His meticulous approach ensures personalized care, fostering trust and confidence. Dr. Guida’s ability to address complex cases, including revision surgeries, has led to numerous success stories. Patients often express gratitude for his professionalism and the transformative impact of his work on their lives. These testimonials underscore his reputation as a compassionate and highly skilled surgeon, dedicated to enhancing both form and function.

Community Involvement

Dr. Robert A. Guida is deeply committed to humanitarian efforts, providing surgical care to those with congenital deformities and supporting charitable initiatives that benefit underserved communities.

6.1 Humanitarian Work and Charitable Contributions

Dr. Robert A. Guida is dedicated to humanitarian efforts, particularly in providing surgical care for individuals with severe congenital deformities. His charitable work focuses on helping those born with significant facial and nasal abnormalities, often traveling to underserved regions to offer life-changing procedures. Through his affiliations with NewYork-Presbyterian and Weill Cornell Medicine, he supports initiatives that bring medical care to those in need. Dr. Guida’s contributions have made a profound impact, restoring both function and confidence in his patients. His commitment to giving back to the community underscores his dedication to using his surgical skills for the greater good, both domestically and internationally.

Media Presence

Dr. Robert A. Guida is frequently featured in medical publications and media, highlighting his expertise in facial plastic surgery and rhinoplasty. His work has been recognized in prominent outlets, showcasing his contributions to the field and patient success stories.

7.1 Features in Medical Publications and Media

Dr. Robert A. Guida is prominently featured in various medical publications and media for his expertise in facial plastic surgery. His work in rhinoplasty and revision rhinoplasty has been highlighted in top-tier medical journals, showcasing his innovative techniques and successful patient outcomes. Additionally, he has appeared in New York Magazine’s “Best Beauty Doctors” issue, further cementing his reputation as a leading authority in his field. His contributions to both medical education and public awareness have made him a sought-after figure in media, where he shares insights on the latest advancements in cosmetic and reconstructive surgery.

Dr. Robert A. Guida stands as a distinguished figure in facial plastic and reconstructive surgery, renowned for his exceptional skill and dedication to patient care. With over three decades of experience, he has established himself as a leader in rhinoplasty, revision rhinoplasty, and facial rejuvenation. His affiliation with NewYork-Presbyterian and Weill Cornell Medicine underscores his commitment to excellence. Dr. Guida’s humanitarian efforts and contributions to medical education further highlight his dedication to advancing the field. His recognition in publications and patient testimonials reflect the trust and admiration he has earned. Dr. Guida’s legacy continues to inspire, combining surgical precision with compassion, making him a true pioneer in his field.

johnson pocket door installation instructions

Johnson Pocket Door Systems offer a space-saving, durable solution for smooth door operation, ideal for residential and commercial applications, enhancing privacy and accessibility with versatile designs․

Overview of Johnson Pocket Door Hardware

Johnson Pocket Door Hardware offers durable, high-quality systems designed for smooth operation and long-lasting performance․ Their frames feature all-steel split studs, self-tapping drywall screws, and compatibility with soft-close mechanisms․ The hardware supports doors up to 125 lbs and 36″-48″ widths, ensuring versatility for various applications․ Easy-to-follow installation instructions and pre-drilled holes simplify setup․ Optional upgrades like soft-close kits enhance functionality, making Johnson systems a reliable choice for residential and commercial use, ensuring secure and quiet door movement․

Benefits of Using Johnson Pocket Door Systems

Johnson Pocket Door Systems provide space-saving solutions, ideal for maximizing room utility while ensuring smooth, quiet operation․ Their heavy-duty construction supports large doors, offering durability and reliability․ ADA compliance ensures accessibility, with door handles positioned for easy reach․ Soft-close options enhance functionality, reducing noise and wear․ Easy installation and compatibility with various door sizes make Johnson systems versatile for residential and commercial use, blending practicality with modern design for a seamless integration into any space․

Tools and Materials Needed for Installation

Essential tools: power drill, screwdrivers, measuring tape, level, utility knife, pencil, and stud finder․ Materials: drywall screws, split studs, hangers, track systems, and optional soft-close kits․

Essential Tools for Pocket Door Installation

Primary tools needed: power drill, screwdrivers (Phillips and flathead), measuring tape, level, utility knife, pencil, and stud finder․ Additional tools: saw or cutting tool for track adjustments, wrench or pliers for tightening, and a ladder for overhead work․ Optional: clamps for aligning frames․ These tools ensure accurate measurements, secure fastening, and proper alignment of the pocket door system, streamlining the installation process and guaranteeing a professional finish․

Required Materials for a Successful Setup

Key materials: Johnson Pocket Door Frame Kit (includes steel split studs, self-tapping drywall screws, and trim screws), 2×4 wall studs, drywall, door slab, door handles, and locks․ Optional: soft-close kit for smooth operation․ Ensure all components are compatible with your door size and weight․ The frame kit is pre-marked for easy cutting to accommodate various door dimensions, simplifying the installation process and ensuring a precise fit for your space-saving solution․

Understanding the Johnson Pocket Door Components

The system includes a sturdy frame, track, hangers, and split studs, designed for smooth door operation and durability in various wall structures, ensuring reliable performance․

Key Parts of the Johnson Pocket Door Frame

The Johnson Pocket Door Frame consists of a sturdy header, split studs, and tracks․ The header supports the door’s weight, while split studs ensure a secure fit within the wall․ Tracks are mounted atop the header, allowing smooth door movement․ These components are engineered for durability and ease of installation, ensuring a reliable and long-lasting pocket door system․

Role of Split Studs and Track Systems

Split studs provide structural integrity and ensure a secure fit within the wall, while track systems enable smooth door movement․ The tracks are mounted on the header, supporting hangers that glide effortlessly․ These components are designed for durability, ensuring proper alignment and functionality․ Split studs and tracks are crucial for a stable and efficient pocket door operation, making them essential for a successful installation․

Johnson 1500 Series Pocket Door Installation

The Johnson 1500 Series offers heavy-duty, commercial-grade pocket door solutions, designed for 2×4 stud walls, ensuring smooth operation with durable, all-steel split studs and tracks․

Step-by-Step Guide for 1500PF and 1500HD Models

Begin by ensuring the wall structure is a standard 2×4 configuration․ Attach the door plate to the top of the door, 2 inches from each edge, with locking tabs aligned․ Insert the hanger onto the track and mount the door by aligning the door plate with the track system․ Secure the header and casing, then install the split studs․ Use self-tapping screws for drywall and trim․ Finally, attach door handles and locks, ensuring proper alignment and smooth operation․

Special Instructions for 1500SC Soft-Close Models

For the 1500SC Soft-Close models, install the included soft-close damper kit to ensure smooth, quiet door operation․ Attach the bumper to the back edge of the door, 1 meter from the bottom, and center the hanger plates on the door’s top, 50mm from each edge․ Ensure the soft-close mechanism is properly aligned with the track system․ Follow the manufacturer’s guidelines for adjusting the soft-close tension to achieve optimal performance․ This feature enhances user experience by eliminating slamming and providing a gentle closure․

Johnson 2710/2711 Series Pocket Door Instructions

Johnson’s 2710/2711 series offers prefabricated frames for streamlined installation, featuring unique components designed for smooth operation and durability, ideal for modern door systems․

Unique Features of the 2710/2711 Series

The 2710/2711 series stands out with its prefabricated frames, designed for quick and precise installation․ These frames are constructed with durable materials and include advanced features like soft-close compatibility and heavy-duty tracks․ They are ideal for modern applications, offering smooth operation and minimal maintenance․ The series also includes bumper installations and centered hanger plates, ensuring stability and alignment․ These features make the 2710/2711 series a preferred choice for both residential and commercial settings, providing reliability and aesthetic appeal․

Installation Tips for Prefabricated Frames

Installing prefabricated frames from Johnson requires precise alignment and leveling․ Ensure the wall studs are properly marked and spaced to fit the frame․ Use shims to adjust for uneven surfaces and secure the frame tightly․ Follow the manufacturer’s instructions for attaching hangers and tracks․ Double-check all measurements before finalizing the installation․ Proper alignment ensures smooth door operation and prevents future adjustments․ Always refer to the provided diagrams for accurate placement of components․

Johnson 200PD Series Pocket Door Hardware

Johnson’s 200PD Series offers a robust multi-pass system designed for heavy-duty applications, ensuring durability and smooth operation in high-traffic environments with advanced track and hanger technology․

Multi-Pass Pocket Door System Details

The Johnson 200PD Series features a multi-pass pocket door system, designed for heavy-duty applications․ This system accommodates doors weighing up to 125 lbs and measuring up to 36 inches wide․ It includes all-steel split studs and a durable track system, ensuring smooth and quiet operation․ The frame is compatible with doors of varying thicknesses and can be easily customized to fit specific installation needs․ This series is ideal for commercial settings requiring robust and reliable door solutions․

Advanced Features for Heavy-Duty Applications

The Johnson 200PD Series boasts advanced features tailored for heavy-duty applications․ Its all-steel split studs and robust track system ensure maximum stability and durability․ The frame accommodates doors up to 125 lbs, making it suitable for commercial use․ Pre-drilled holes and self-tapping screws simplify installation, while compatibility with soft-close kits enhances functionality․ This series also meets ADA standards, ensuring accessibility and ease of use, making it a premium choice for demanding environments requiring both strength and reliability․

Post-Installation Adjustments and Finishing Touches

Ensure proper door alignment and smooth operation by fine-tuning the track and hangers․ Install handles and locks securely, and verify all components are functioning flawlessly․

How to Fine-Tune the Door Alignment

Ensure the door operates smoothly by checking its alignment post-installation․ Loosen the track screws slightly and adjust the track using a level for proper alignment․ Retighten the screws once aligned․ Verify the door glides effortlessly without binding, adjusting the hangers if necessary․ Ensure the door is plumb and level for consistent functionality․ Proper alignment prevents wear and tear, ensuring long-lasting performance and smooth operation of your Johnson pocket door system․

Adding Door Handles and Locks

Once the door is installed, attach handles and locks according to your preference․ Use the provided screws to secure them tightly․ Ensure handles are aligned properly and locks function smoothly․ Position handles at a comfortable height for easy access, typically around 36-40 inches from the floor․ This step finalizes the door’s functionality, enhancing both convenience and security, ensuring your Johnson pocket door system is fully operational and user-friendly․

Troubleshooting Common Installation Issues

Addressing door misalignment, track obstructions, and hanger malfunctions ensures smooth operation․ Regularly inspect hardware and tighten loose components to maintain functionality and prevent future issues․

Resolving Door Misalignment Problems

Door misalignment can occur due to improper installation or settling walls․ To fix, check the track for level and plumb, ensuring all components are securely fastened․ Adjust hanger positions if necessary and verify door alignment with the frame․ If issues persist, refer to the Johnson installation manual or consult a professional for precise adjustments to restore smooth operation and proper functionality․

Fixing Track and Hanger Malfunctions

To address track and hanger issues, inspect the track for proper alignment and ensure all screws are tightened․ Lubricate the rollers to reduce friction and check for worn-out parts․ Replace any damaged components and realign the track system․ If problems persist, refer to the Johnson installation guide or seek professional assistance to restore smooth door operation and ensure durability․

Safety Considerations and Best Practices

Ensure secure installation by following Johnson’s guidelines, using proper tools, and adhering to weight limits․ Regularly inspect hardware for wear and tear to maintain safety and functionality․

Ensuring Secure and Durable Installation

For a secure and durable setup, use the provided self-tapping screws and all-steel split studs․ Ensure proper alignment of the track system and door frame․ Regular inspections of hangers and rollers are essential to prevent wear․ Follow the weight limits (125lbs per door) and recommended door sizes (max 914mm x 2032mm)․ Use a spirit level to confirm all components are perfectly aligned and plumb․ This ensures smooth operation and longevity of the Johnson pocket door system․

ADA Compliance and Accessibility Features

Johnson Pocket Door Systems are designed to meet ADA standards, ensuring accessibility for all users․ The door handles are positioned at a convenient height, and the smooth operation allows easy opening with minimal effort․ The systems are engineered for quiet, trouble-free performance, making them ideal for individuals with mobility challenges․ Durable construction and low maintenance ensure long-term accessibility, meeting the needs of diverse users while maintaining high functionality and aesthetic appeal․

After installation, inspect the Johnson Pocket Door System for smooth operation, proper alignment, and secure hardware․ Ensure all components function seamlessly, providing durability and aesthetic appeal for years․

Verifying Proper Functionality

After installation, test the Johnson Pocket Door to ensure smooth gliding and proper alignment․ Check that the door opens and closes without resistance, and all hardware functions as intended․ Verify the door stops correctly and the soft-close mechanism, if installed, operates smoothly․ Ensure the door handle and locks are securely fastened and accessible․ Inspect for any gaps or misalignment, making adjustments as needed for optimal performance and durability․

Maintaining Your Johnson Pocket Door System

Regularly inspect and clean the track and rollers to ensure smooth operation․ Lubricate moving parts periodically to maintain functionality․ Tighten any loose screws or bolts and replace worn components promptly․ Check door alignment and adjust as needed to prevent uneven movement․ Follow manufacturer recommendations for care and maintenance to extend the system’s lifespan and warranty․ Proper upkeep ensures years of reliable service and optimal performance from your Johnson Pocket Door System․

2010 ford fusion owners manual

Welcome to the 2010 Ford Fusion Owners Manual. This guide helps you understand your vehicle’s features, maintenance, and troubleshooting. Explore key features, driving tips, and safety systems for optimal performance and care.

1.1 Overview of the Manual’s Purpose and Structure

The 2010 Ford Fusion Owners Manual is designed to provide clear, concise information about your vehicle’s operation, maintenance, and safety features. Structured logically, the manual guides owners through key aspects of their car, from routine maintenance to advanced technology. It covers essential topics like driving tips, troubleshooting, and technical specifications, ensuring a comprehensive understanding of the vehicle. This resource helps owners make informed decisions and ensures optimal performance, safety, and longevity of their 2010 Ford Fusion.

1.2 Key Features of the 2010 Ford Fusion

The 2010 Ford Fusion offers a blend of style, technology, and performance. It features a range of powertrains, including a 2.5L I4 engine, 3.0L V6, and a hybrid option for eco-conscious drivers. The Fusion includes advanced systems like Sync for hands-free connectivity, a premium audio system, and available features such as a rearview camera and blind-spot monitoring. Its spacious interior, comfortable seating, and intuitive controls make it a versatile choice for both daily commutes and family trips, ensuring a satisfying ownership experience.

Maintenance and Servicing Schedule

The 2010 Ford Fusion requires annual or 10,000-mile maintenance, including oil changes, tire rotations, and fluid checks. Follow the schedule for optimal performance and longevity.

2.1 Recommended Maintenance Intervals

The 2010 Ford Fusion requires regular maintenance to ensure optimal performance. Follow the recommended schedule, which includes oil changes every 5,000 to 7,500 miles and tire rotations every 6,000 miles. Brake pads, air filters, and belts should be inspected annually or as specified. Fluid checks, including coolant and transmission fluid, are essential for longevity. Refer to the manual for detailed intervals tailored to your driving conditions to maintain your vehicle’s health and prevent potential issues.

2.2 Tire Replacement and Care Guidelines

For the 2010 Ford Fusion, tire replacement is recommended every 4 years or 30,000 miles. Regularly inspect tread depth and look for signs of wear. Proper inflation, as specified in the manual, ensures safety and efficiency. Rotate tires every 6,000 miles to maintain even wear. Check for damage like cracks or bulges and replace tires if necessary. Always use tires of the correct size and type for your vehicle to ensure optimal performance and safety on the road.

2.3 Fluid Checks and Replacement Recommendations

Regular fluid checks are essential for the 2010 Ford Fusion. Engine oil should be changed every 6,000 to 7,500 miles, using Ford-approved synthetic blends. Transmission fluid levels should be inspected every 12,000 miles, with replacement recommended every 60,000 miles. Coolant should be tested every 30,000 miles and replaced at 100,000 miles. Brake fluid should be checked annually and replaced every 60,000 miles. Proper fluid maintenance ensures optimal performance, prevents corrosion, and extends vehicle lifespan. Always use fluids meeting Ford specifications to avoid damage.

Operating Features of the 2010 Ford Fusion

The 2010 Ford Fusion features advanced climate control, adjustable seating, and security systems. It also includes SYNC technology and steering wheel controls for enhanced comfort and control, ensuring a smooth and enjoyable driving experience.

3.1 Heating and Air Conditioning Systems

The 2010 Ford Fusion features a manual heating and air conditioning system, as well as an optional dual automatic temperature control. The system provides precise temperature regulation for driver and passenger comfort. Key features include automatic climate control, air quality sensors, and a rainlamp feature for improved visibility. The dual-zone system allows independent temperature settings for both front seats. Regular maintenance, such as checking coolant levels and ensuring proper airflow, ensures optimal performance. Adjusting settings seasonally and using recirculation mode can enhance efficiency and comfort.

3.2 Seat Adjustments and Lumbar Support

The 2010 Ford Fusion offers adjustable seats for optimal comfort. Manual and power-adjustable seats are available, with features like lumbar support to customize your driving position. Adjust the front seats to suit your preference, and utilize the manual lumbar support for enhanced back comfort. The passenger seat can also be folded for additional cargo space. For added convenience, second-row seats include adjustable head restraints. These features ensure a comfortable and ergonomic driving experience, tailored to your needs.

3.3 Security Systems and Keyless Entry

The 2010 Ford Fusion features advanced security systems for enhanced protection. The Securicode keyless entry system allows convenient unlocking and locking of doors. The SecuriLock passive anti-theft system immobilizes the engine to prevent unauthorized starts. For added safety, the vehicle includes a perimeter alarm and illuminated entry. You can deactivate or activate these features using the keyless entry or door locks. Lost keys can be replaced, and integrated keyhead transmitters can be reprogrammed for seamless operation. This ensures your Fusion remains secure and easily accessible.

Safety Systems and Precautions

The 2010 Ford Fusion prioritizes safety with dual-stage airbags, safety belt pretensioners, and the Personal Safety System. Follow guidelines for child restraints and seatbelt use to ensure optimal protection.

4.1 Airbag and Supplemental Restraint Systems

The 2010 Ford Fusion is equipped with a comprehensive airbag system, including dual-stage front airbags and side curtains. These systems work in conjunction with safety belts to provide enhanced protection during collisions. The airbags deploy based on crash severity to minimize injury risk. Always ensure proper belt usage, as the airbag system’s effectiveness depends on it. Regular inspection and proper maintenance are crucial to ensure all components function correctly in emergencies.

4.2 Child Safety Restraint Guidelines

The 2010 Ford Fusion Owners Manual provides essential guidelines for installing child safety restraints. Use the LATCH system for secure installation of rear-facing, forward-facing, or booster seats. Ensure the seat fits your child’s weight and height, and always follow the manufacturer’s instructions. The manual recommends securing the seat with both the vehicle’s seat belt and the LATCH system for added safety. Regularly inspect the restraint system to ensure proper fit and functionality, and refer to the manual for detailed instructions to minimize risks and ensure your child’s protection.

4.3 Safety Belt and Pretensioner Systems

The 2010 Ford Fusion is equipped with advanced safety belt and pretensioner systems designed to enhance occupant protection. The pretensioners tighten the safety belts immediately during sudden stops or collisions, ensuring optimal restraint. This system works in conjunction with airbags to reduce injury risk. Proper use is essential, with belts snugly secured across the chest and hips. Regular inspection of belts and buckles is recommended to ensure functionality. Always follow the manual’s guidelines for maintenance and usage to maximize safety.

Driving Tips and Techniques

Optimize your driving experience with efficient habits, smooth transmission shifts, and proper use of the all-wheel-drive system for improved traction and control on various road conditions.

5.1 Transmission and Gearshift Operations

The 2010 Ford Fusion offers smooth transmission and gearshift operations for enhanced driving control. For manual transmission models, press the clutch fully before shifting gears to ensure smooth transitions. Automatic models feature a 6-speed SelectShift Automatic transmission, allowing manual gear selection for precise control. Use the gearshift lever to select P, R, N, D, or L modes. For optimal performance, use the correct gear range for road conditions, such as L for uphill climbs or heavy loads. Proper use ensures efficient power delivery and a responsive driving experience.

5.2 All-Wheel Drive (AWD) System

The 2010 Ford Fusion’s available All-Wheel Drive (AWD) system enhances traction and stability by automatically distributing power to all four wheels. It activates when front wheel slippage is detected, improving control on slippery surfaces like rain or light snow. The AWD system operates seamlessly without driver input, providing better grip and confidence. However, it is not designed for extreme off-road conditions. For optimal performance, avoid deep sand or mud, as the system may not engage effectively in such scenarios. Always maintain proper tire pressure for AWD functionality.

5.3 Fuel Efficiency and Driving Habits

The 2010 Ford Fusion offers various engine options, including a fuel-efficient 2.5L I4 and a 3.0L V6, with the hybrid model providing excellent MPG for eco-conscious drivers. To maximize fuel efficiency, maintain proper tire pressure, drive smoothly, and avoid excessive idling. Using cruise control on highways can also enhance fuel economy. By adopting these driving habits, you can optimize your Fusion’s performance while reducing fuel consumption, ensuring a balance between power and efficiency on the road.

Technical Specifications and Capacities

The 2010 Ford Fusion features a 2.5L I4 or 3;0L V6 engine, with a 6-speed manual or automatic transmission. Fuel capacity is approximately 17.5 gallons, supporting efficient driving.

6.1 Engine and Transmission Specifications

The 2010 Ford Fusion offers a range of engine options, including a 2.5L I4 producing 175 horsepower and a 3.0L V6 delivering 240 horsepower. A 3.5L V6 engine is also available in higher trims for enhanced power. Transmission choices include a 6-speed manual or automatic, providing smooth gear transitions. Additionally, a hybrid option with a 2.5L I4 engine combines efficiency with performance. These specifications ensure a balance of power, fuel efficiency, and driving comfort, catering to various driver preferences and needs.

6.2 Tire and Wheel Information

The 2010 Ford Fusion features 16-inch wheels with all-season tires as standard, while higher trims offer 17- or 18-inch options. Tire pressure monitoring systems ensure optimal inflation. Regular tire rotations and balancing are recommended for even wear. Replace tires every 4 years or 30,000 miles, or as indicated by tread wear. The spare tire is stored in the trunk, and dissimilar spare tires may be used temporarily. Wheel lug nuts should be tightened to the specified torque for safety and proper performance.

6.3 Fuel and Fluid Capacity Details

The 2010 Ford Fusion has a fuel tank capacity of 17.5 gallons for the 2.5L and 3.0L engines, and 18 gallons for the 3.5L engine. Coolant capacity is 6.4 quarts for the 2.5L and 3.0L engines, and 6.9 quarts for the 3.5L. Engine oil capacity is 5 quarts for the 2.5L and 3.0L engines, and 6 quarts for the 3.5L. Transmission fluid levels should be checked when warm, and brake fluid should be inspected every 10,000 miles for optimal performance and vehicle maintenance.

Troubleshooting and Diagnostic Tips

Identify common issues using warning lights and diagnostic codes. Follow step-by-step guides to resolve problems like faulty sensors or system malfunctions, ensuring your Fusion runs smoothly.

7.1 Common Issues and Solutions

Common issues with the 2010 Ford Fusion include transmission problems, faulty tire pressure sensors, and airbag warning lights. For transmission concerns, check fluid levels and ensure proper shifting. Tire pressure sensors may need recalibration after tire changes. Airbag lights often indicate a system malfunction, requiring professional diagnosis. Electrical issues, like malfunctioning keyless entry, can be resolved by reprogramming or replacing faulty components. Always refer to diagnostic codes and follow manual guidelines for accurate troubleshooting and repair.

7.2 Understanding Warning Lights and Indicators

Warning lights in your 2010 Ford Fusion indicate various system statuses. The check engine light signals engine issues, while the oil pressure light warns of low oil levels. The tire pressure monitoring system (TPMS) light indicates low tire pressure. Other lights include ABS and traction control warnings. Always consult your manual for specific explanations. Ignoring these lights can lead to serious damage. Addressing them promptly ensures vehicle safety and optimal performance.

7.3 Resetting and Reinitializing Systems

Resetting systems in your 2010 Ford Fusion ensures proper functionality after repairs or adjustments. The Tire Pressure Monitoring System (TPMS) can be reset via the menu or manually. The SYNC system may require a master reset to resolve connectivity issues. For the anti-theft system, reinitializing involves reprogramming key fobs. Always follow the manual’s instructions to avoid system malfunctions. Proper resetting ensures safety and maintains your vehicle’s advanced features. Regular checks and resets can prevent unexpected system failures while driving.

sunrise alarm clock instructions

Sunrise alarm clocks simulate a natural sunrise with gradual light and sound to wake you gently, promoting a natural wake-up experience and improved morning routine consistency.

1.1 What is a Sunrise Alarm Clock?

A sunrise alarm clock is a device that simulates a natural sunrise by gradually increasing light and sound before your wake-up time, helping you wake up more naturally. It typically starts 30 minutes before the alarm, mimicking dawn, and often includes features like FM radio, Bluetooth, and adjustable brightness for a gentle morning transition.

1.2 Benefits of Using a Sunrise Alarm Clock

A sunrise alarm clock helps you wake up naturally by simulating a sunrise, reducing morning grogginess. It improves mood and energy by aligning your wake-up time with natural light cycles. This method is particularly beneficial for people with Seasonal Affective Disorder (SAD) and those who struggle with traditional alarms, promoting a smoother transition into the day.

Choosing the Right Sunrise Alarm Clock

Selecting the right sunrise alarm clock involves considering features like light intensity, sound options, and smart connectivity. Popular models include Philips SmartSleep and Lumie Bodyclock, known for their natural sunrise simulations and customizable settings, ensuring a gentle wake-up experience tailored to your preferences and needs.

2.1 Key Features to Look For

Key features include adjustable sunrise duration, light intensity, and sound options. Look for FM radio, Bluetooth connectivity, and smart home integration. Portability, battery life, and customizable settings like multiple alarms and snooze functions are also essential. Ensure the device fits your lifestyle and preferences for an optimal waking experience;

2.2 Popular Models and Brands

Popular sunrise alarm clock models include the Philips SmartSleep, Lumie Bodyclock, and Hatch Restore. Brands like Philips Hue and Casper Glow also offer innovative options. These devices are highly rated for their advanced features, reliability, and user-friendly designs, making them top choices for improving sleep and wake-up routines.

Setting Up Your Sunrise Alarm Clock

Unbox and place your sunrise alarm clock, plug it in, and set the time. Customize light and sound settings to your preference for a seamless experience.

3.1 Unboxing and Initial Setup

Start by carefully unboxing your sunrise alarm clock and placing it on a stable surface. Plug in the device and press the power button to turn it on. Use the MENU button to navigate through settings, selecting your preferred language, time format, and date. Press SELECT to confirm each option. This initial setup ensures your clock is ready for further customization.

3.2 Placement and Orientation

Place your sunrise alarm clock across from your bed, at eye level, to ensure the light fills the room evenly. Position it at least 10 feet away from your bed for optimal light distribution. Avoid direct sunlight on the device, as it may interfere with the light sensor. Ensure the clock faces toward you for the best sunrise simulation experience.

3.3 Customizing Light and Sound Settings

Adjust the brightness and color temperature to match your preferences for a comfortable wake-up experience. Choose from preset sounds or add your favorite music to create a personalized alarm. Set the sunrise duration and light intensity to gradually wake you up. Experiment with different combinations to find the perfect balance for your morning routine.

Using the Sunrise Alarm Clock

Set your wake-up time and duration, then let the device gradually brighten and play sounds to wake you naturally. Adjust settings as needed for a seamless experience.

4.1 Setting the Wake-Up Time and Sunrise Duration

Navigate to the alarm settings, choose your desired wake-up time, and select the sunrise duration, typically ranging from 10 to 60 minutes. A shorter duration provides a quicker wake-up, while a longer one offers a more gradual transition. Ensure consistency for optimal results and adjust as needed for personal comfort and effectiveness.

4.2 Understanding the Sunrise Simulation Process

The sunrise simulation process begins with soft light and sound, gradually increasing to mimic dawn. It starts 30 minutes before your set alarm time, with light intensifying from dim to bright, and sounds optionally added to signal waking. This natural transition helps your body adjust, making mornings feel more effortless and aligned with your circadian rhythm.

4.3 Adjusting Brightness and Color Temperature

Adjust brightness levels to suit your preference, starting soft and gradually increasing. Color temperature can be customized, offering warmer tones for a cozy feel or cooler tones for enhanced alertness. These settings ensure a personalized wake-up experience, helping your body transition smoothly from sleep to wakefulness with optimal comfort and natural alignment to your circadian rhythm.

Advanced Features and Customization

Explore advanced features like FM radio, Bluetooth connectivity, and smart home integration. Customize settings to enhance your wake-up experience with tailored light, sound, and connectivity options.

5.1 FM Radio and Bluetooth Connectivity

Sunrise alarm clocks often include FM radio and Bluetooth features, allowing you to wake up to your favorite stations or stream music/podcasts. Pair devices effortlessly for a personalized wake-up experience, enhancing your morning routine with versatile audio options and seamless connectivity for optimal convenience and enjoyment.

5.2 Multiple Alarms and Snooze Function

Sunrise alarm clocks often feature multiple alarms for different days and times, ensuring flexibility. The snooze function provides a gentle grace period, allowing you to wake up more gradually. These features enhance customization, making it easier to adapt to varying schedules and preferences, improving wake-up consistency and overall morning experience.

5.3 Smart Home Integration

Sunrise alarm clocks with smart home integration offer seamless connectivity via Wi-Fi or Bluetooth, enabling voice control through assistants like Alexa or Google Home. This feature allows synchronization with other smart devices, such as lights or thermostats, to create a cohesive wake-up environment. Integration enhances convenience and personalization, making mornings more efficient and enjoyable.

Troubleshooting Common Issues

Diagnose issues like light not turning on or alarms not triggering. Check power connections, settings, and software updates. Resolve connectivity problems by restarting or resetting the device.

6.1 Light Not Turning On

Ensure the device is properly plugged in and the outlet is functional. Check if the light setting is enabled and brightness levels are adjusted. Restart the clock or reset it to factory settings if issues persist. Verify that no obstructions are blocking the light output.

If problems continue, contact customer support for assistance.

6.2 Alarm Not Going Off

Ensure the alarm is enabled, volume is set correctly, and the wake-up time is accurate. Check if snooze is active or if alarms are disabled. Verify that the alarm sound is selected and not muted. Restart the device to resolve potential software glitches. If issues persist, reset the clock to factory settings or consult the user manual.

6.4 Connectivity Problems

If experiencing connectivity issues, restart your router and device. Ensure the clock is connected to the correct Wi-Fi network and Bluetooth is properly paired. Check for software updates or reset the device to factory settings. Consult the user manual for specific troubleshooting steps or contact customer support for further assistance.

Maintenance and Care

Regularly clean the screen with a soft cloth and avoid harsh chemicals. Update software periodically to ensure optimal performance and fix potential bugs or connectivity issues.

7.1 Cleaning the Device

Use a soft, dry cloth to gently wipe the display and exterior surfaces. Avoid harsh chemicals or abrasive materials, as they may damage the screen. For stubborn smudges, lightly dampen the cloth with water, but ensure no moisture seeps into the device. Regular cleaning prevents dust buildup and maintains optimal light clarity and performance.

7.2 Updating Software

Regularly check for software updates via the app or device settings. Connect to Wi-Fi, initiate the update, and avoid turning off the device until the process completes. Follow on-screen instructions carefully to ensure a smooth update. Updates often improve functionality, add features, or fix bugs, keeping your sunrise alarm clock performing optimally and securely.

7.3 Battery Care (for Portable Models)

For portable sunrise alarm clocks, charge the battery using the provided cable and avoid overcharging. Store the device in a cool, dry place when not in use. Replace batteries annually or as indicated by manufacturer guidelines. If the battery life diminishes, reset the device or consult the user manual for troubleshooting steps to restore optimal performance.

Tips for Effective Use

Place the clock strategically, use light and sound together, and experiment with brightness levels. Regularly update software and clean the device to ensure optimal performance and longevity.

8.1 Consistency in Wake-Up Time

Set a consistent wake-up time, even on weekends, to stabilize your circadian rhythm. Gradually adjust the alarm if needed to avoid shocking your system. Consistency helps your body adapt, improving alertness and energy levels throughout the day. Aim for a routine that aligns with your natural sleep-wake cycle for optimal results.

8.2 Combining with a Bedtime Routine

Enhance your sunrise alarm clock experience by pairing it with a consistent bedtime routine. Avoid screens, read, or meditate before bed to signal your body it’s time to rest. Synchronize your alarm with your routine to improve sleep quality and wake-up effectiveness. Adjust settings to align with your body’s natural rhythm for better results.

8.3 Adjusting to Seasonal Changes

Adapt your sunrise alarm clock to seasonal changes by adjusting the light duration and intensity. In winter, extend the sunrise simulation for a gentler wake-up, while shorter durations work best in summer. Customize color temperature to mimic natural daylight patterns, ensuring consistent wake-up times and alignment with your circadian rhythm year-round.

Health Benefits and Scientific Background

Sunrise alarm clocks regulate circadian rhythms, improving wake-up quality and mental health by simulating natural daylight, aligned with scientific studies on light therapy and biological responses.

9.1 Circadian Rhythm and Wake-Up Light

Sunrise alarm clocks align with your circadian rhythm by mimicking natural sunrise, gradually increasing light to signal wakefulness. This synchronization enhances alertness, mood, and energy levels, supported by scientific studies on light therapy and its effects on the body’s internal clock.

9.2 Impact on Morning Grogginess

Sunrise alarm clocks reduce morning grogginess by simulating a natural sunrise, gradually increasing light and sound to signal wakefulness. This gentle transition helps the body adjust, reducing the disorientation often caused by sudden alarms, and promotes a more refreshed and alert start to the day, especially beneficial for those with Seasonal Affective Disorder (SAD).

9.3 Benefits for People with SAD

Sunrise alarm clocks are particularly beneficial for individuals with Seasonal Affective Disorder (SAD), as they simulate natural sunlight, helping regulate circadian rhythms. The gradual light exposure mimics sunrise, improving mood and energy levels, especially during darker winter months when natural light is scarce, making it easier to wake up and feel refreshed.

Sunrise alarm clocks offer a gentle, natural way to start your day, improving wake-up routines and overall well-being through simulated sunlight and soothing sounds.

10.1 Final Thoughts on Sunrise Alarm Clocks

Sunrise alarm clocks are a revolutionary tool for enhancing wake-up routines, offering a gentle, natural transition into mornings. By mimicking sunrise and incorporating soothing sounds, they promote better sleep quality and energy levels. Their customizable features make them adaptable to diverse lifestyles, ensuring a refreshing start to the day for everyone.

10.2 Encouragement to Try the Device

Experience the transformative power of sunrise alarm clocks by incorporating one into your daily routine. Their innovative approach to waking up gently can significantly improve your mornings and overall well-being. With customizable settings and natural light simulation, these devices offer a small yet impactful change to start your day feeling refreshed and energized.

Next Steps

Explore where to purchase sunrise alarm clocks, such as popular models like Philips SmartSleep or Lumie Bodyclock. Check online retailers or specialty stores for options and additional resources.

11;1 Where to Buy

Sunrise alarm clocks are available at major retailers like Amazon, Best Buy, and Walmart. Popular models include Philips SmartSleep, Lumie Bodyclock, and Hatch Restore 2. You can also purchase directly from manufacturers’ websites or specialty stores. Online platforms often offer competitive pricing, user reviews, and easy returns, making them convenient options for shoppers.

11.2 Additional Resources for Further Reading

For deeper insights, visit manufacturer websites like Philips, Lumie, and Hatch for detailed guides and FAQs. Online reviews from Wirecutter or The Sleep Foundation offer unbiased comparisons. Additionally, health blogs and sleep science websites provide articles on circadian rhythms and wake-up light benefits. User manuals and YouTube tutorials are also excellent resources for troubleshooting and customization tips.