Discover the joy of creating handmade rope baskets! This tutorial guides you through crafting versatile, bohemian-inspired baskets perfect for home decor or functional storage solutions․
1․1 What is a Rope Basket?
A rope basket is a handmade container crafted from materials like rope, fabric strips, or cord, often associated with bohemian or rustic aesthetics․ It is a versatile and eco-friendly item used for storage, home decor, or as a functional bag․ Rope baskets are known for their durability and natural appeal, making them perfect for organizing small items or adding a decorative touch to any room․ Available in various sizes and shapes, they can serve multiple purposes, from holding crafting supplies to storing everyday essentials․ Handles can be added for portability, enhancing both utility and style․
1․2 Benefits and Uses of Rope Baskets
Rope baskets are versatile and practical, offering a charming, eco-friendly way to organize and store items․ They are ideal for home decor, adding a bohemian touch to any room․ Use them to store small items like toys, books, or craft supplies, or as a laundry basket․ Rope baskets are also perfect for gift-giving, serving as a unique and personalized packaging option․ Their durability and natural aesthetic make them suitable for both indoor and outdoor use, while their portability allows them to double as a stylish bag for everyday errands․ Customize them to match your personal style for a functional and fashionable accessory․
1․3 Popular Styles and Designs
Rope baskets come in a variety of styles to suit different tastes and purposes․ Macrame-inspired designs are particularly popular, featuring intricate knots and bohemian aesthetics․ Tassel-adorned baskets add a trendy touch, while minimalist designs offer a clean, modern look․ Natural materials like cotton rope or macrame cord are often used for their earthy appeal․ Baskets can be crafted in various shapes, from round to oval, and sizes, ranging from small storage containers to large laundry hampers․ Customizable handles and embellishments allow for personalization, making each basket unique and adaptable to any home decor style․
Materials Needed
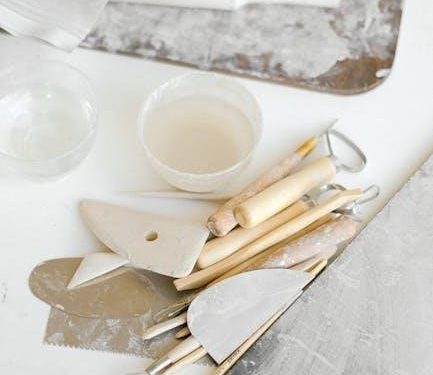
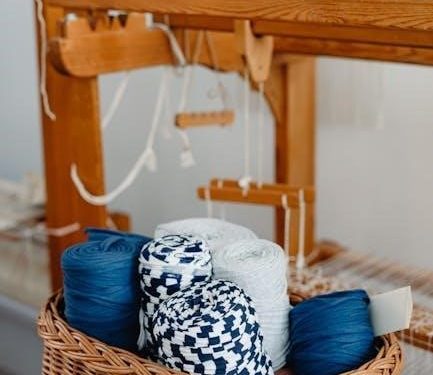
Gather essential supplies like cotton rope, macrame cord, or bulky yarn․ Include scissors, a hot glue gun, and a measuring tape for precise crafting․
2․1 Essential Supplies
To begin, gather sturdy materials like cotton rope, macrame cord, or bulky yarn․ You’ll also need scissors, a hot glue gun, and a measuring tape for accurate measurements․ A flat surface for coiling and a bowl or plate for shaping are helpful․ Optionally, include fabric scraps or thread for added customization․ Ensure all tools are within reach to streamline the crafting process and achieve a polished finish for your rope basket․
2․2 Optional Materials for Customization
Elevate your rope basket’s uniqueness with optional materials like fabric scraps, ribbons, or embroidery floss for wrapping or stitching details․ Beads, sequins, or tassels can add a decorative touch, secured with hot glue or a needle․ Paint or dye can refresh the rope’s color, while stencils or markers offer personalized patterns․ For a bohemian vibe, incorporate natural elements like shells or dried flowers․ These extras allow you to tailor your basket to match your style, making it truly one-of-a-kind and reflective of your creativity․
Step-by-Step Guide
Master the process of crafting a rope basket with clear, easy-to-follow instructions․ Learn coiling techniques, wrapping methods, and how to secure and shape your basket perfectly․
3․1 Coiling and Wrapping Techniques
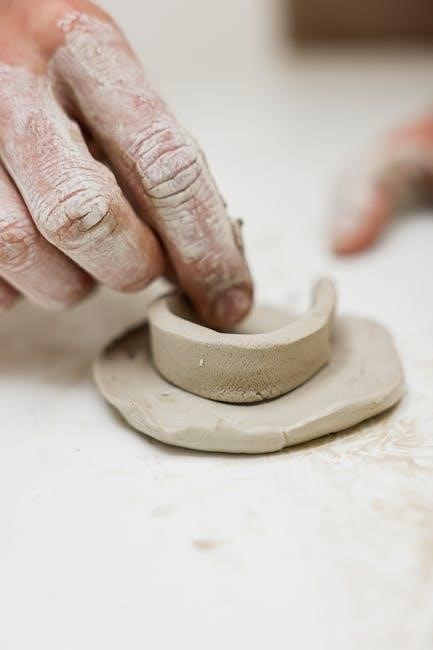
Begin by coiling the rope into a circular base, securing each layer with a dab of hot glue․ Wrap the rope around the previous coil, maintaining even tension to ensure stability․ For a polished look, tuck the rope ends neatly as you progress․ Experiment with overlapping patterns or adding fabric strips for texture․ Use a needle or craft tool to weave tighter coils if desired․ This method forms the foundation of your basket, so take time to align each coil precisely for a professional finish․
3․2 Securing and Shaping the Basket
Once the base is coiled, secure the structure by applying hot glue between the rope layers․ Gently pull the rope upward to form the basket walls, maintaining even tension to avoid misshaping․ Use a flat surface to ensure stability as you build upwards․ For a rounded shape, guide the rope with your hands, or use a mold for uniformity․ Adjust the firmness by tightening or loosening the coils․ Allow the glue to cool before handling․ This step ensures your basket holds its form and remains durable for everyday use․
3․3 Adding Handles and Finishing Touches
Add functionality and style by attaching sturdy handles․ Cut two equal rope or fabric strips, fold them over the basket’s rim, and secure with hot glue․ For a polished look, tuck the ends neatly under the coiled rope․ Trim excess glue and ensure all edges are smooth․ Embellish with tassels or beads for a personalized touch․ Finally, inspect the basket for any loose areas and reinforce if needed․ Your handcrafted rope basket is now ready for use or display, offering both practicality and aesthetic charm․
Tips and Tricks
Maintain even tension while coiling to prevent wobbling․ Use fabric scraps for unique textures․ Ensure tight wrapping to avoid gaps․ Apply hot glue carefully for secure bonds․ Keep your workspace clean and organized for efficiency․ Experiment with embellishments to personalize your basket․ Follow these tips to achieve professional-looking results and enhance your crafting experience․
4․1 Avoiding Common Mistakes
- Avoid uneven tension while coiling to prevent wobbling or misshapen baskets․
- Ensure tight wrapping to avoid gaps and maintain structural integrity․
- Use the correct needle size for your fabric to prevent thread breakage․
- Apply hot glue carefully to avoid burns and excess adhesive․
- Keep your workspace clean to avoid tangles and misplaced materials․
- Use a consistent angle when wrapping to maintain uniformity․
- Test materials beforehand to ensure compatibility and durability․
4․2 Enhancing Durability and Aesthetics
To enhance your rope basket’s durability, use high-quality materials like cotton cording or macrame rope, and ensure tight weaving․ Apply a fabric sealant to protect against moisture․ For aesthetics, add embellishments like tassels or beads, and experiment with natural dyes for unique colors․ Incorporate fabric scraps or yarn for a personalized touch․ Allow the basket to set fully before use to maintain its shape․ These tips ensure your rope basket is both functional and visually appealing, perfect for home decor or storage solutions․
Safety Precautions
Handle sharp tools and hot glue with care to avoid injuries․ Work in a well-ventilated area and avoid flammable materials․ Keep materials away from children․
5․1 Handling Hot Glue Safely
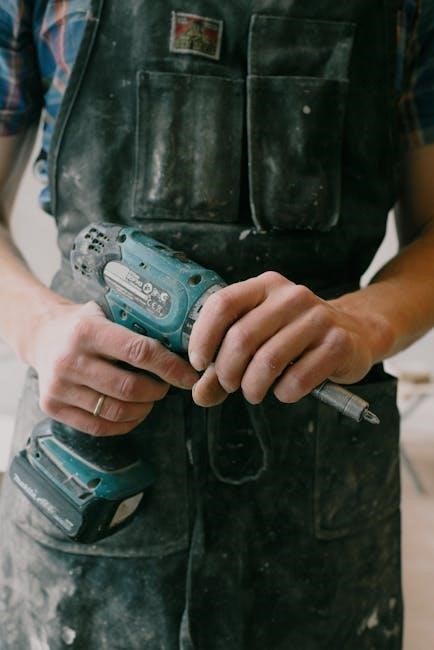
When using hot glue, always handle the gun with care to prevent burns․ Wear protective gloves and work in a well-ventilated area․ Keep the glue gun away from children and avoid touching the nozzle or hot glue streams․ Use a stable surface and ensure the area is clear of flammable materials․ Allow the glue to cool slightly before handling glued items․ Store the glue gun safely after use, unplugged and out of reach․ Proper handling ensures a safe and enjoyable crafting experience․
5․2 Working in a Safe Environment
Ensure your workspace is safe and organized before starting your rope basket project․ Work in a well-ventilated area to avoid inhaling glue or material fumes․ Keep flammable materials, such as fabric scraps or paper, away from heat sources․ Use protective gloves and eyewear when handling hot glue or sharp objects․ Clear the area of clutter to prevent accidents and maintain good lighting for visibility․ Store materials and tools securely, and keep the glue gun on a heat-resistant surface․ A safe environment ensures a enjoyable and stress-free crafting experience․
Variations and Customization
Customize your rope basket by experimenting with different materials, colors, and embellishments․ Personalize sizes, patterns, and styles to suit your preferences and creative vision for unique results․
6․1 Size and Color Variations
Explore endless possibilities by adjusting the size and color of your rope basket․ Use longer or shorter ropes to create baskets of varying dimensions, from small organizers to large storage solutions․ For colors, opt for natural hues or dye the rope to match your desired aesthetic․ Add stripes, ombre effects, or multicolored patterns for a personalized touch; This versatility allows you to craft baskets that fit any room’s decor, whether modern, bohemian, or rustic, ensuring a unique and functional piece every time․
6․2 Embellishments and Personalization
Elevate your rope basket by adding embellishments like tassels, beads, or decorative stitching․ Incorporate ribbons, fabric scraps, or yarn for a unique texture․ Personalize with monograms, painted patterns, or natural elements like shells․ Experiment with dyeing the rope in vibrant hues or staining it for a distressed look․ Adding a charm or a personalized tag can give your basket a distinctive touch․ These creative flourishes allow you to tailor your design to your style, making each piece truly one-of-a-kind and reflective of your artistic vision․
Finished Product Showcase

Showcase your beautifully crafted rope basket! Display it proudly as a decorative piece or functional storage solution․ Its bohemian vibe adds charm to any room, perfect for organizing or gifting․
7․1 Ideas for Using Your Rope Basket
Your handmade rope basket is incredibly versatile! Use it as a stylish storage solution for toys, linens, or bathroom essentials․ Showcase it as a decorative centerpiece or gift basket․ Add a bohemian touch to your living room by filling it with books or plants․ Small baskets are perfect for organizing desk supplies or jewelry, while larger ones can store blankets or laundry․ Customize the size and style to match your space, ensuring it enhances both functionality and aesthetics in any room․
Get creative and display your unique craftsmanship proudly!
7․2 Display and Storage Solutions
Showcase your rope basket as a decorative wall hanging or use it as a charming centerpiece for your dining table․ Add greenery, flowers, or candles for a stylish touch․ Store small items like toys, books, or bathroom essentials neatly․ Larger baskets are perfect for holding blankets or laundry․ Experiment with stacking or nesting baskets for a tidy, organized look․ Highlight your craftsmanship by displaying your basket proudly, ensuring it enhances both functionality and aesthetics in your home or workspace․