Eyelashes play a crucial role in enhancing beauty and self-confidence. This guide explores various methods to enhance lashes, from magnetic lashes to lash extensions, and provides expert tips for maintenance and care.
1.1 Importance of Eyelashes in Beauty and Self-Confidence
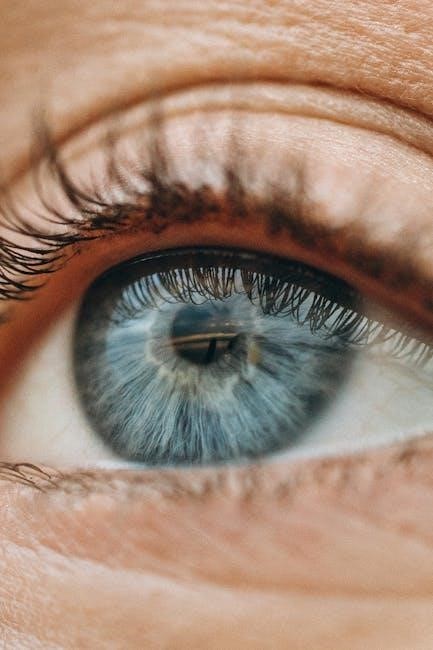
Eyelashes are a defining feature of beauty, framing the eyes and enhancing facial expressions. They play a significant role in self-confidence, as they contribute to a polished and attractive appearance. Full, healthy lashes can make eyes appear larger and more vibrant, boosting one’s self-perception. Society often associates lush eyelashes with youthfulness and allure, making them a focal point in beauty routines. Beyond aesthetics, eyelashes serve as a natural protective barrier, shielding eyes from dust and debris. Their importance extends to both functional and emotional well-being, making lash care a priority for many. Whether through natural growth or enhancements, lashes are a key element in achieving a confident, radiant look.
1.2 Brief Overview of Popular Eyelash Enhancement Methods
Popular eyelash enhancement methods include magnetic lashes, lash extensions, and lash lifts. Magnetic lashes offer a quick, damage-free solution, using magnetic strips to adhere to natural lashes. Lash extensions provide a semi-permanent option, with synthetic or natural fibers applied to individual lashes for a voluminous look. Lash lifts are a curling treatment that enhances natural lash shape without extensions. Each method caters to different preferences and lifestyles, offering varying levels of maintenance and durability. These enhancements not only boost beauty but also simplify daily routines for those seeking to elevate their eye appeal. Choosing the right method depends on personal style, budget, and desired results, making eyelash enhancements a versatile and accessible beauty solution.
Types of Eyelash Enhancements
Explore various eyelash enhancement options like magnetic lashes, lash extensions, and lash lifts. Each offers unique benefits, catering to different preferences and lifestyles for desired eye appeal.

2.1 Magnetic Lashes: Application Tips and Benefits

Magnetic lashes offer a quick, damage-free alternative to traditional false lashes. They come with magnetic strips that sandwich your natural lashes, securing without glue. To apply, align the lash strip with your natural lash line and gently press for a seamless hold. Benefits include ease of use, no adhesive mess, and minimal damage to natural lashes. They are ideal for those seeking a temporary, hassle-free solution. Proper alignment ensures a natural look, while pressing firmly enhances longevity. Magnetic lashes are reusable and available in various styles, catering to different eye shapes and preferences. They provide a convenient option for achieving fuller, more defined lashes without the commitment of semi-permanent methods.

2.2 Lash Extensions: Costs, Risks, and Maintenance
Lash extensions are a popular semi-permanent solution for fuller lashes, with costs ranging from $100 to $300, depending on the technician and location. Risks include potential allergic reactions to the adhesive, lash damage from improper application, or uneven regrowth. Proper maintenance is essential; avoid rubbing your eyes, and clean lashes gently to prevent buildup. Refills are typically needed every 2-3 weeks to maintain the desired look. Choosing an experienced technician is crucial to minimize risks and ensure a safe, satisfying experience. Despite the investment, many find the results worth the effort for their convenience and aesthetic appeal.
2.3 Lash Lifts: Semi-Permanent Treatment for Curled Eyelashes
A lash lift is a semi-permanent treatment that curls and enhances the natural shape of your lashes, lasting up to 6-8 weeks. Unlike lash extensions, it doesn’t involve adding synthetic lashes but instead uses a perming solution to lift and curl your own. The procedure is relatively quick, taking about 45 minutes, and requires minimal aftercare. Costs typically range from $75 to $150. Risks are rare but may include eye irritation or lash breakage if improper techniques are used. Experts recommend avoiding mascara or heavy eye products for the first 24 hours to ensure the best results. Many find this treatment ideal for a low-maintenance yet impactful beauty boost.

Eyelash Care and Maintenance
Proper cleaning techniques and refill tips maintain lash health. Solutions for itchy lids or crusty lashes ensure long-lasting, beautiful results using the right products.
3.1 How to Clean Eyelashes Properly
Cleaning your eyelashes is essential for maintaining their health and appearance. Start by gently removing dirt or makeup using a mild cleanser and lukewarm water. Avoid harsh products or rubbing, as this can damage the lashes or irritate the sensitive skin around the eyes. For those with lash extensions, use a lash-specific cleanser to prevent adhesive breakdown. Dip a cotton swab in the cleanser and carefully wipe along the lash line, ensuring no residue remains. Rinse thoroughly with clean water and pat dry with a soft cloth. Regular cleaning prevents buildup, crusty lashes, and itchy lids, promoting long-lasting, healthy lashes. Consistency is key to maintaining their natural beauty and preventing potential irritations.
3.2 Refill and Aftercare Tips for Long-Lasting Lashes
To maintain long-lasting lashes, regular refills are essential. Schedule appointments every 2-3 weeks to fill in gaps as lashes naturally shed. Aftercare is crucial; avoid water or steam for 24-48 hours post-application to allow adhesives to set. Gently wash lashes with a lash-specific cleanser to remove oil or makeup, which can weaken the bond. Avoid using oil-based products near the eyes, as they can dissolve the adhesive. Sleep on your back or use a silk pillowcase to reduce lash friction. Brush lashes daily to prevent tangling and maintain their shape. Refills not only extend the life of your lashes but also keep them looking full and vibrant. Proper aftercare ensures a safe, comfortable, and beautiful lash experience.
3.3 Common Eyelash Concerns: Itchy Lids, Crusty Lashes, and Solutions
Itchy lids and crusty lashes are common concerns, often caused by buildup from oil, makeup, or debris. Gently cleansing the lashes with a lash-specific cleanser can help remove residue and prevent irritation. Avoiding oil-based products near the eyes is crucial, as they can clog lash follicles. Crusty lashes may indicate improper aftercare or adhesive buildup, which can be addressed by using a mild cleanser and avoiding excessive touching. For itchy lids, ensuring the lashes are applied correctly and avoiding allergic reactions to adhesives is key. Regular lash maintenance and proper aftercare routines can significantly reduce these issues, promoting healthy and comfortable lashes. Consulting a professional for persistent problems is always recommended to ensure long-term lash health and comfort.
Eyelash Tools and Products
Eyelash tools and products, such as curlers, adhesives, and mascaras, enhance lash appearance. Quality products ensure safety and effectiveness, while proper usage maintains lash health and beauty.
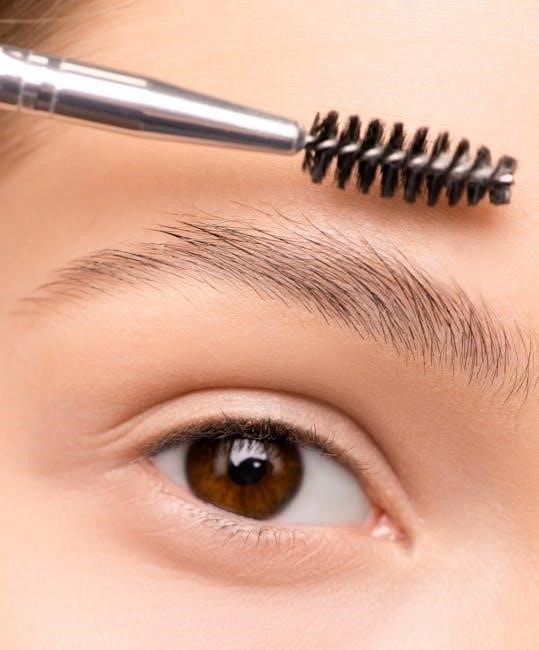
4.1 Best Eyelash Curlers for Different Eyelash Types
Eyelash curlers are essential for enhancing lash shape and length. Full-size curlers suit most lash types, while half-size options are ideal for shorter or harder-to-reach lashes. Heated curlers add extra lift without damaging lashes. Mini curlers are perfect for precise application. Choosing the right curler depends on lash length, thickness, and desired effect. For natural-looking curls, opt for a gentle, rubber-pad curler. For dramatic results, consider a heated or mechanical curler. Always use curlers gently to avoid lash breakage. Cleaning curlers regularly ensures hygiene and longevity. Pairing curlers with mascara amplifies their effect, creating stunning, voluminous lashes effortlessly.
4.2 Natural Mascara Alternatives: DIY Clay Mascara
For those seeking natural mascara alternatives, DIY clay mascara offers a chemical-free solution. Made from natural ingredients like Australian clays, coconut oil, and shea butter, this mascara promotes healthy lashes while enhancing their appearance. Mix bentonite or kaolin clay with a carrier oil and melted shea butter for the base. Add a pinch of activated charcoal for color intensity. Apply using a spoolie or clean brush for even coverage. This eco-friendly option is ideal for sensitive eyes and avoids harsh chemicals found in store-bought products. While it may not provide the same volume as commercial mascaras, it offers a natural, effortless look. Customizable ingredients allow users to tailor the formula to their preferences, making it a popular choice for those embracing organic beauty routines.
4.3 Adhesives and Glues for False Eyelashes: Safety and Usage
Adhesives for false eyelashes are essential for a secure and long-lasting application. When choosing a glue, opt for latex-free or hypoallergenic options to minimize irritation, especially for sensitive skin. Apply a thin layer to the lash band and wait a few seconds for it to become tacky before placing it along your natural lash line. Avoid excessive glue to prevent clumping or damage to your lashes. For removal, gently peel the lashes off and clean the adhesive with makeup remover. Always patch test the glue on your wrist before use to ensure no allergic reactions. Proper usage and removal techniques help maintain lash health and extend the lifespan of your false eyelashes. Prioritize high-quality, safe adhesives to enhance your lash experience.

Eyelash Trends and Expert Tips
Explore the latest trends in eyelash beauty, from semi-permanent treatments to innovative tools. Experts share tips on achieving natural, voluminous lashes while maintaining lash health and safety.
5.1 Expert Advice from Lash Technicians and Dermatologists
Lash technicians and dermatologists emphasize the importance of proper application and aftercare for eyelash enhancements. They recommend choosing high-quality materials to minimize irritation and ensure long-lasting results. For lash extensions, technicians advise regular refills to maintain a natural look and prevent damage. Dermatologists suggest avoiding harsh chemicals and opting for hypoallergenic adhesives to reduce the risk of allergic reactions. Both experts agree on the significance of cleaning lashes daily to prevent buildup and infections. They also recommend using gentle products and avoiding excessive rubbing. For magnetic lashes, proper alignment and removal techniques are key to avoiding lash damage. Experts encourage consulting professionals for personalized advice to achieve the best outcomes while protecting lash health.

5.2 Future Trends in Eyelash Beauty and Technology
The future of eyelash beauty is poised to blend innovation and sustainability. Emerging trends include biodegradable lash products, eco-friendly adhesives, and advanced semi-permanent treatments. Technology is also playing a role, with smart tools like heated lash curlers and AI-powered lash applicators gaining popularity. Personalized lash services, such as custom extensions based on eye shape and lash type, are expected to rise. Additionally, there is growing interest in lash serums infused with biotech ingredients to promote natural growth. Experts predict a shift toward healthier, more sustainable practices without compromising on style. As beauty meets technology, the eyelash industry is set to evolve, offering more options for individuals to achieve their desired look while prioritizing lash health and environmental consciousness.
Perfect lashes enhance beauty and confidence; Explore methods like magnetic lashes, extensions, and natural care to achieve your desired look while maintaining lash health and longevity. This guide provides essential insights for every preference and need.
6.1 Final Thoughts on Achieving Perfect Eyelashes
Achieving perfect eyelashes is a blend of art and care. Whether you opt for magnetic lashes, extensions, or natural enhancement, prioritize lash health and longevity. Regular maintenance, proper cleaning, and using high-quality products are key to stunning results. Expert advice from technicians and dermatologists can guide you in making informed decisions. Stay updated on trends like semi-permanent treatments and innovative tools to keep your lashes looking their best. Remember, confidence starts with healthy, beautiful eyes. Choose methods that align with your lifestyle and preferences, ensuring your lashes remain a striking feature of your beauty routine. With the right techniques and care, you can enjoy lashes that enhance your natural charm.